
什么是 IPFS
星际文件系统(InterPlanetary File System,缩写为 IPFS)是一个旨在实现文件的分布式存储、共享和持久话的网络传输协议。它是一个内容可寻址的点对点超媒体分发协议。在IPFS网络中的节点构成一个分布式文件系统。
IPFS Gateway
IPFS 网关 (gateway) 允许访问者通过 HTTP 请求从 IPFS 网络访问数据。默认情况下,IPFS 网关配置在 8080 端口上,数据将通过以下方式从正在运行 IPFS 的服务器上获取:
http://{your_ip_address}:8080/ipfs/{content ID}
or
https://{gateway URL}/ipfs/{content ID}/{optional path to resource}
关于 IPFS 网关更详细的介绍: https://docs.ipfs.io/concepts/ipfs-gateway/#overview
官方推荐配置 IPFS 网关教程: This tutorial configuring an IPFS gateway on a Google Cloud platform
其他参考链接:
Introduction to IPFS: Run Nodes on Your Network, with HTTP Gateways: https://rossbulat.medium.com/introduction-to-ipfs-set-up-nodes-on-your-network-with-http-gateways-10e21ea689a4
Cloudflare IPFS gateway: Setting up a Server: https://developers.cloudflare.com/distributed-web/ipfs-gateway/setting-up-a-server/
在 Linux 服务器上安装 IPFS
官方安装教程详见: https://docs.ipfs.io/install/command-line/#official-distributions
此处以阿里云 ECS 服务器为例,选择 CentOS 8.5 操作系统。
-
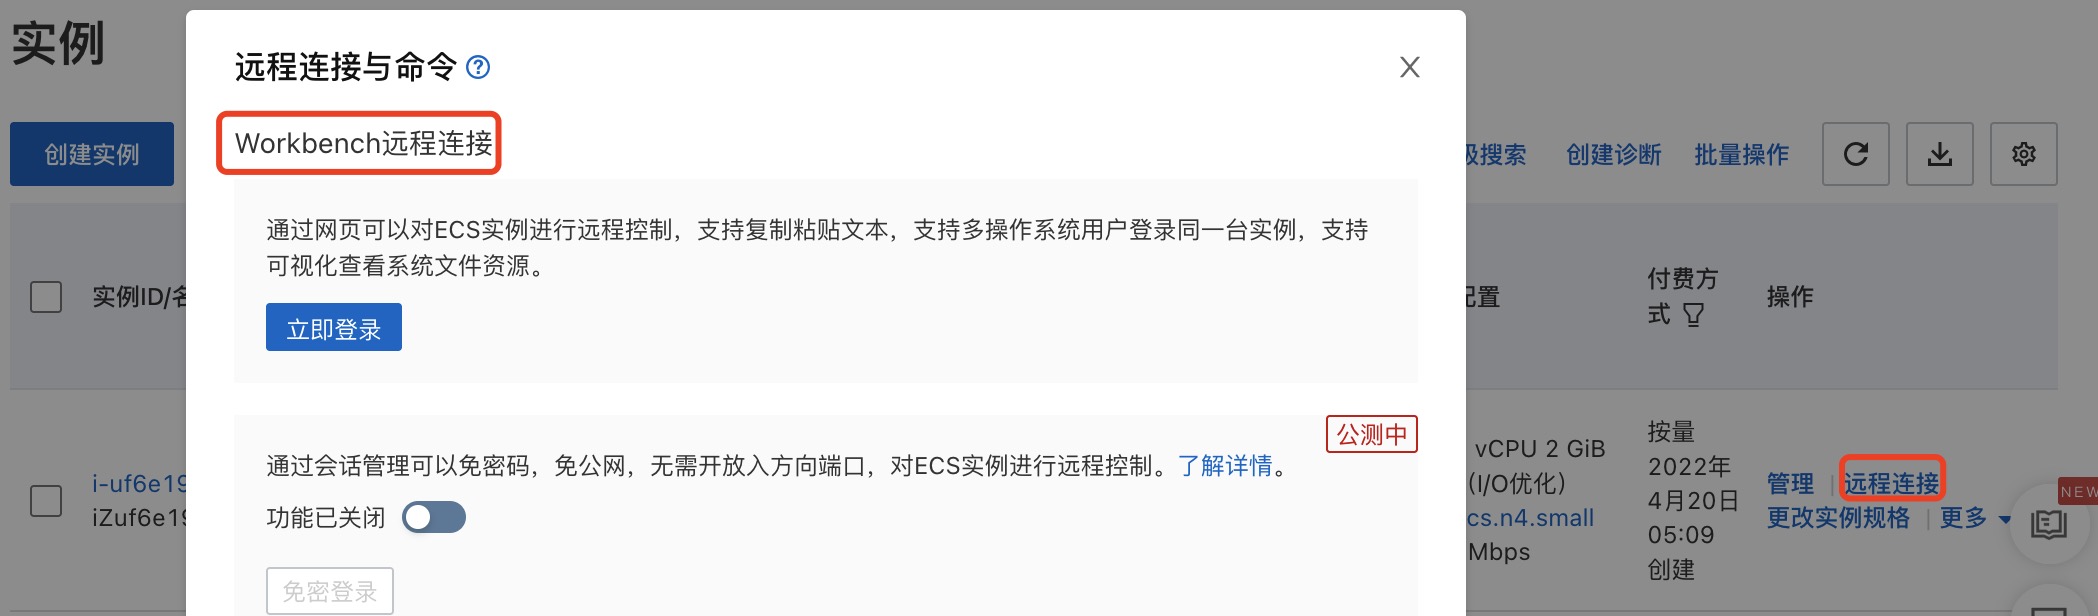
首先点击 “远程连接”,选择 Workbench 远程连接,通过网页远程访问你的 ECS 实例
-
连接服务器之后,可以通过以下两种方式从 dist.ipfs.io 安装 IPFS:
1. 手动安装 go-ipfs
cd ~/
wget https://dist.ipfs.io/go-ipfs/v0.12.2/go-ipfs_v0.12.2_linux-amd64.tar.gz

// 阿里云服务器可能无法访问 dist.ipfs.io
// 作为替代,可以使用 wget -q https://github.com/ipfs/go-ipfs/releases/download/v0.12.2/go-ipfs_v0.12.2_linux-amd64.tar.gz

// 解压文件夹
tar xvfz go-ipfs_v0.4.18_linux-amd64.tar.gz

> x go-ipfs/install.sh
> x go-ipfs/ipfs
> x go-ipfs/LICENSE
> x go-ipfs/LICENSE-APACHE
> x go-ipfs/LICENSE-MIT
> x go-ipfs/README.md

// 进入 go-ipfs 文件夹,运行安装脚本
cd go-ipfs
sudo ./install.sh
> Moved ./ipfs to /usr/local/bin

// 测试 ipfs 是否被正确安装
ipfs --version
> ipfs version 0.12.2
2. 通过 ipfs-update 安装
cd ~/
wget https://dist.ipfs.io/ipfs-update/v1.8.0/ipfs-update_v1.8.0_linux-amd64.tar.gz
tar xvfz ipfs-update_v1.5.2_linux-amd64.tar.gz
cd ipfs-update
sudo ./install.sh
ipfs-update versions
ipfs-update install latest
运行 ipfs-update install latest 将安装最新版本的 go-ipfs,返回如下:
fetching go-ipfs version v0.4.22
binary downloaded, verifying...
success! tests all passed.
stashing old binary
installing new binary to /usr/local/bin/ipfs
checking if repo migration is needed...

Installation complete!
Remember to restart your daemon before continuing
初始化仓库
官方初始化与操作教程详见: https://docs.ipfs.io/how-to/command-line-quick-start/#initialize-the-repository
安装成功后,首先运行 ipfs init 初始化仓库 (repository) 。IPFS 默认将所有设置和内部数据都放在名为 repository 的目录中。返回如下:
ipfs init

> initializing ipfs node at /Users/jbenet/.ipfs
> generating 2048-bit RSA keypair...done
> peer identity: Qmcpo2iLBikrdf1d6QU6vXuNb6P7hwrbNPW9kLAH8eG67z
> to get started, enter:
>
>   ipfs cat /ipfs/QmYwAPJzv5CZsnA625s3Xf2nemtYgPpHdWEz79ojWnPbdG/readme
注意事项: 如果运行 sudo ipfs init,将为 root 用户而不是你的本地用户帐户创建存储库。IPFS 不需要 root 权限,所以最好以普通用户身份运行所有命令!
使用 Systemd 来启动 IPFS 守护进程
Systemd 是大多数较新的 Linux 发行版附带的套件,允许用户创建和管理后台服务。这些服务在服务器启动时自动启动,如果失败则重新启动,并将其输出日志保存到磁盘。
创建以下 systemd 单元文件以在重启期间保持 IPFS 服务器的启动:
- 输入命令
sudo bash -c 'cat >/lib/systemd/system/ipfs.service <<EOL - 写入以下内容:
[Unit]
Description=IPFS Daemon
After=network.target

[Service]
ExecStart=/usr/local/bin/ipfs daemon
User=root
Restart=always
LimitNOFILE=10240
Environment="IPFS_PATH=/mnt/disks/ipfs-disk/ipfs"

[Install]
WantedBy=multi-user.target
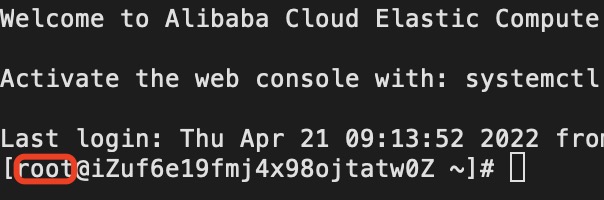
User=root 这一行根据你运行 IPFS 的用户名填写,如下图所示:
- 输入
EOL'结束 - 运行以下命令来告诉 systemd 启动新服务
sudo systemctl daemon-reload
sudo systemctl enable ipfs
sudo systemctl start ipfs
配置 IPFS HTTP 网关
- 运行以下命令配置 CORS
ipfs config --json API.HTTPHeaders.Access-Control-Allow-Origin '["<your domain or all (*)>"]'
ipfs config --json API.HTTPHeaders.Access-Control-Allow-Methods '["PUT", "GET", "POST"]'
- 运行
vi ~/.ipfs/config编辑配置文件
a. 找到 “Gateway”,将其内容修改如下:
// 左右两侧有 ** 号表示被修改的内容
"Gateway": {
    "APICommands": [],
    "HTTPHeaders": {
      "Access-Control-Allow-Headers": [
        "X-Requested-With",
     ** "Access-Control-Expose-Headers", **
        "Range",
        "User-Agent"
      ],
      "Access-Control-Allow-Methods": [
     ** "POST", **
        "GET"
      ],
      "Access-Control-Allow-Origin": [
        "*"
      ],
   ** "Access-Control-Expose-Headers": [
        "Location",
        "Ipfs-Hash"
      ], **
   **  "X-Special-Header": [
        "Access-Control-Expose-Headers: Ipfs-Hash"
      ] **
    },
    "NoDNSLink": false,
    "NoFetch": false,
    "PathPrefixes": [],
    "PublicGateways": null,
    "RootRedirect": "",
 ** "Writable": true **
  },
b. 找到 "Addresses",将 "Gateway": "/ip4/127.0.0.1/tcp/8080"
修改为 "Gateway": "/ip4/0.0.0.0/tcp/8080"
网关配置完成后,重启 IPFS 服务: sudo systemctl restart ipfs
注意事项: IPFS Desktop 支持设置默认存储 (repository 默认在/~.ipfs)、端口号(8080,5001,4001),需要注意防止和其他进程的端口冲突。
访问你的网关
尝试在浏览器中输入以下 URL:
http://<your_ip_address>:8080/ipfs/QmSgvgwxZGaBLqkGyWemEDqikCqU52XxsYLKtdy3vGZ8uq
看到图片就说明你的网关正在工作中。
也可以通过命令行的方式来从 IPFS 网络获取文件
ipfs cat /ipfs/QmSgvgwxZGaBLqkGyWemEDqikCqU52XxsYLKtdy3vGZ8uq
注意事项: 采用以上两种方式无法获取某些文件的原因可能是保存此文件的节点在海外,部署在大陆的服务器无法直接访问。