
Note: If you are not interested in how to run the IPFS nodes, but want to use the IPFS storage service quickly, you can ignore other parts - just scroll down to view the Pinning Service, or view this documentation to learn more about the Pinning Service: https://docs.ipfs.io/how-to/websites-on-ipfs/single-page-website/#pinning-files
What is IPFS
InterPlanetary File System (IPFS) is a network transmission protocol designed to implement distributed storage, sharing and persistence of files. It is a content addressable peer-to-peer hypermedia distribution protocol. The nodes in the IPFS network form a distributed file system.
Using IPFS Desktop
IPFS Desktop is an easy-to-use desktop program that integrates services such as IPFS nodes, file managers, peer managers, and content browsers to facilitate users who are unfamiliar with IPFS operations to quickly understand IPFS.
Installing
If an IPFS node already exists on the current computer, the IPFS Desktop will act as the control panel and file browser of the node. If you do not have a node, it will install one for you. Either way, IPFS Desktop will automatically check for updates.
The specific installation process is detailed in the official document: https://docs.ipfs.io/install/ipfs-desktop
After installation, click Start to enter the status page, as shown below:
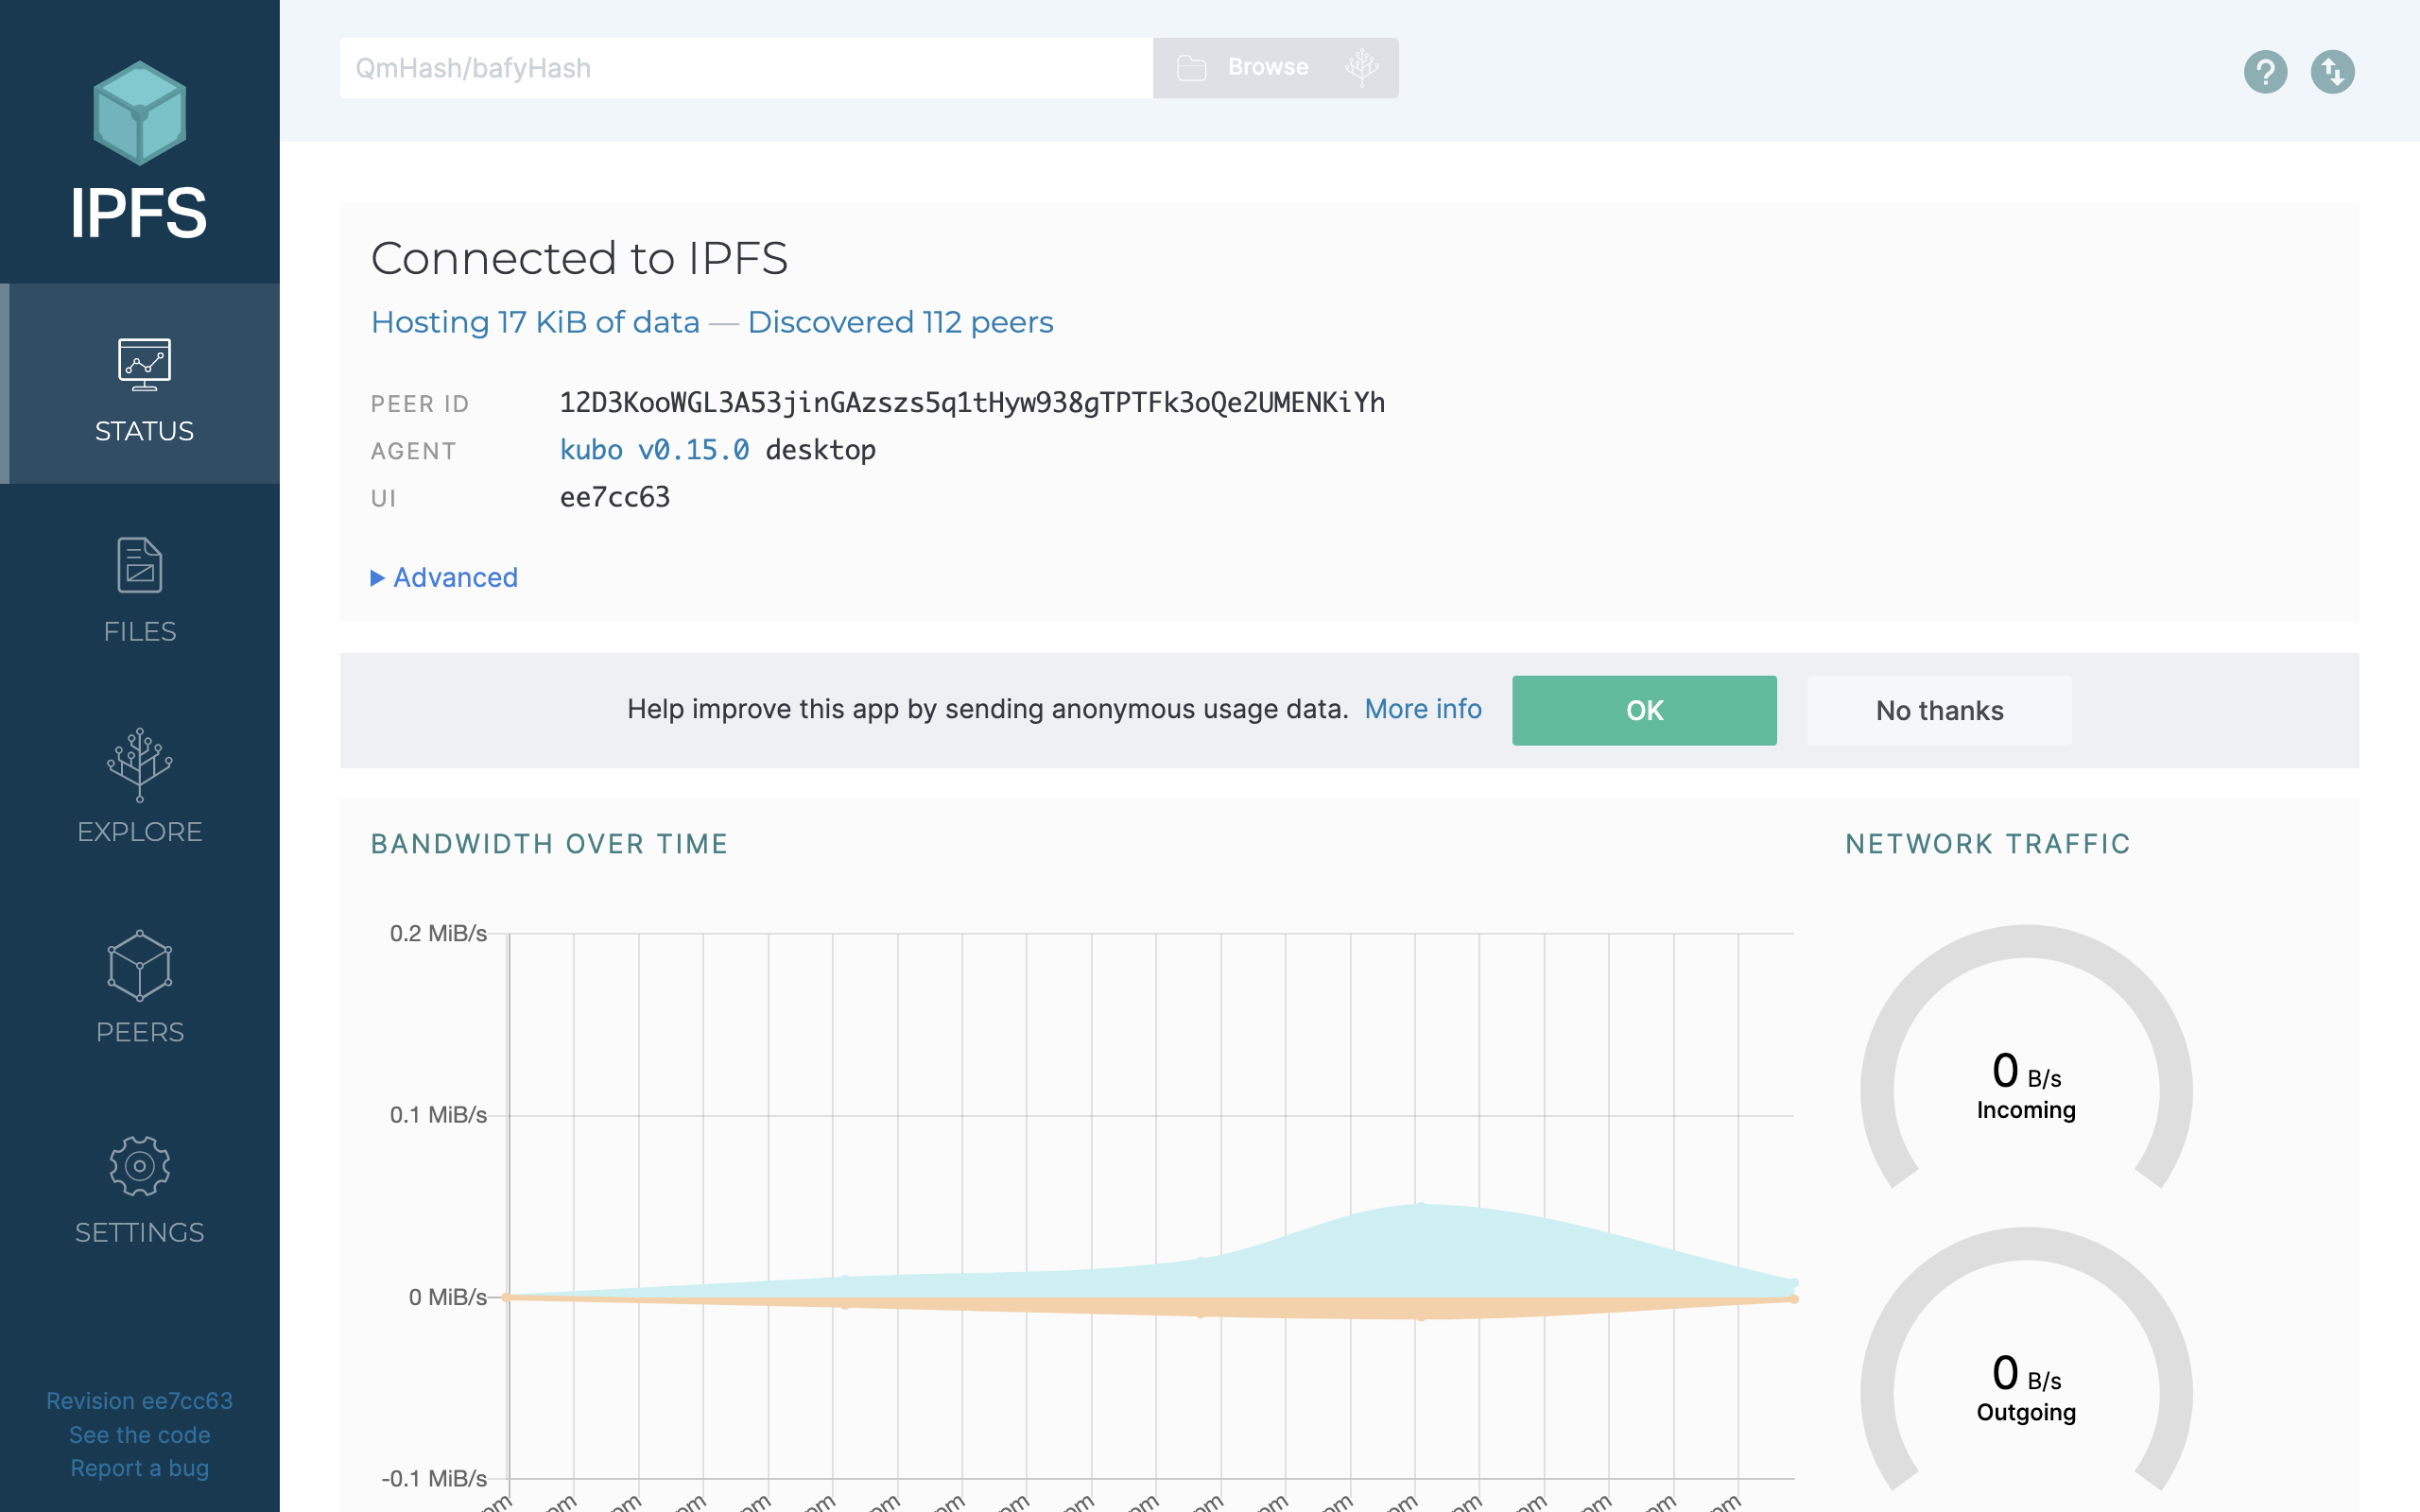
You can see that an IPFS node has been running locally and an ID has been assigned to this node. Other nodes can connect to your node according to this ID. On the status page, you can also see the size of the files hosted by this node and the number of other nodes found on the IPFS network.
File Hosting
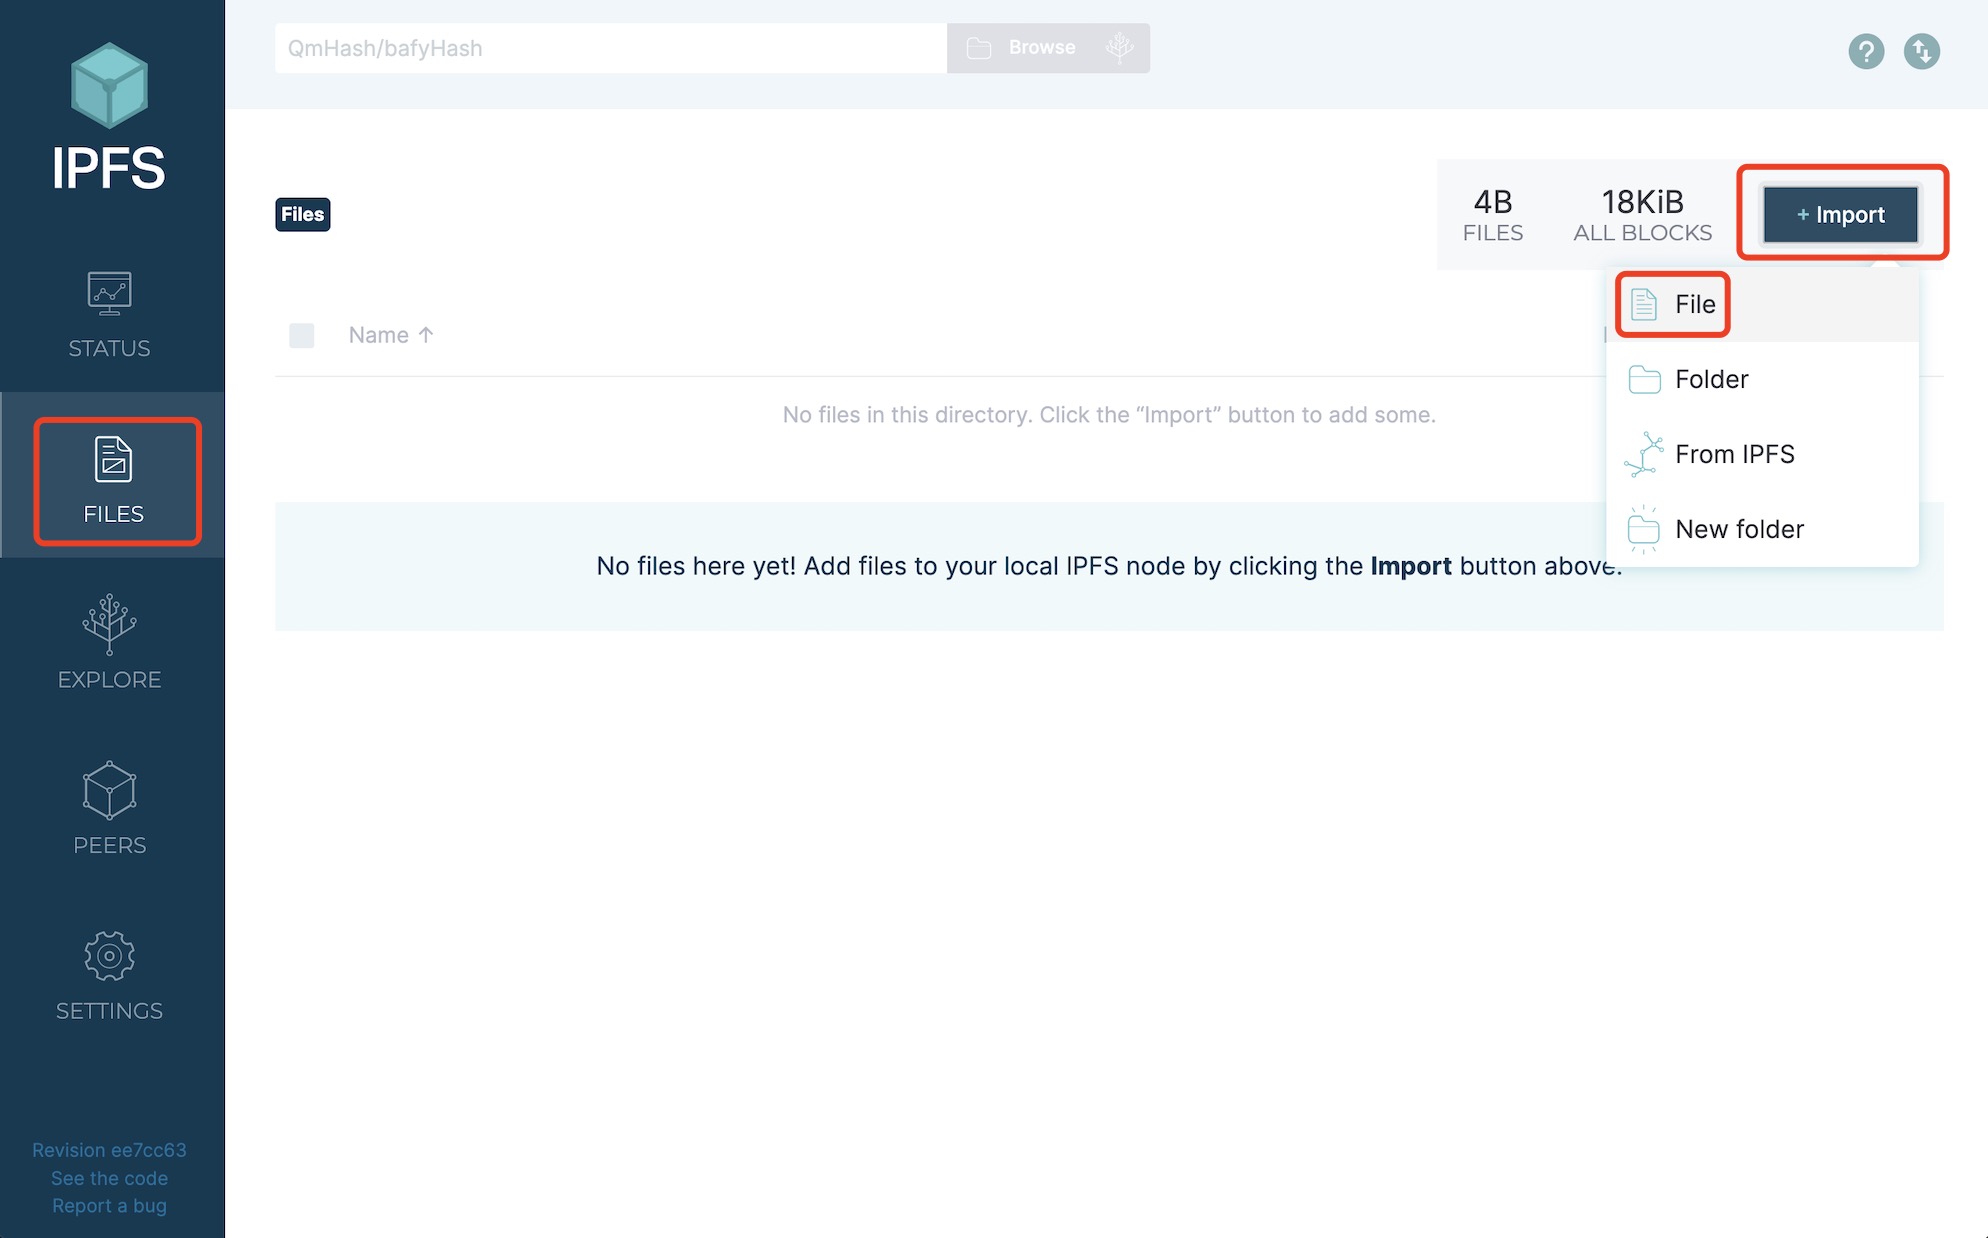
To use IPFS Desktop to store files on the IPFS network, you need to follow the steps below:
-
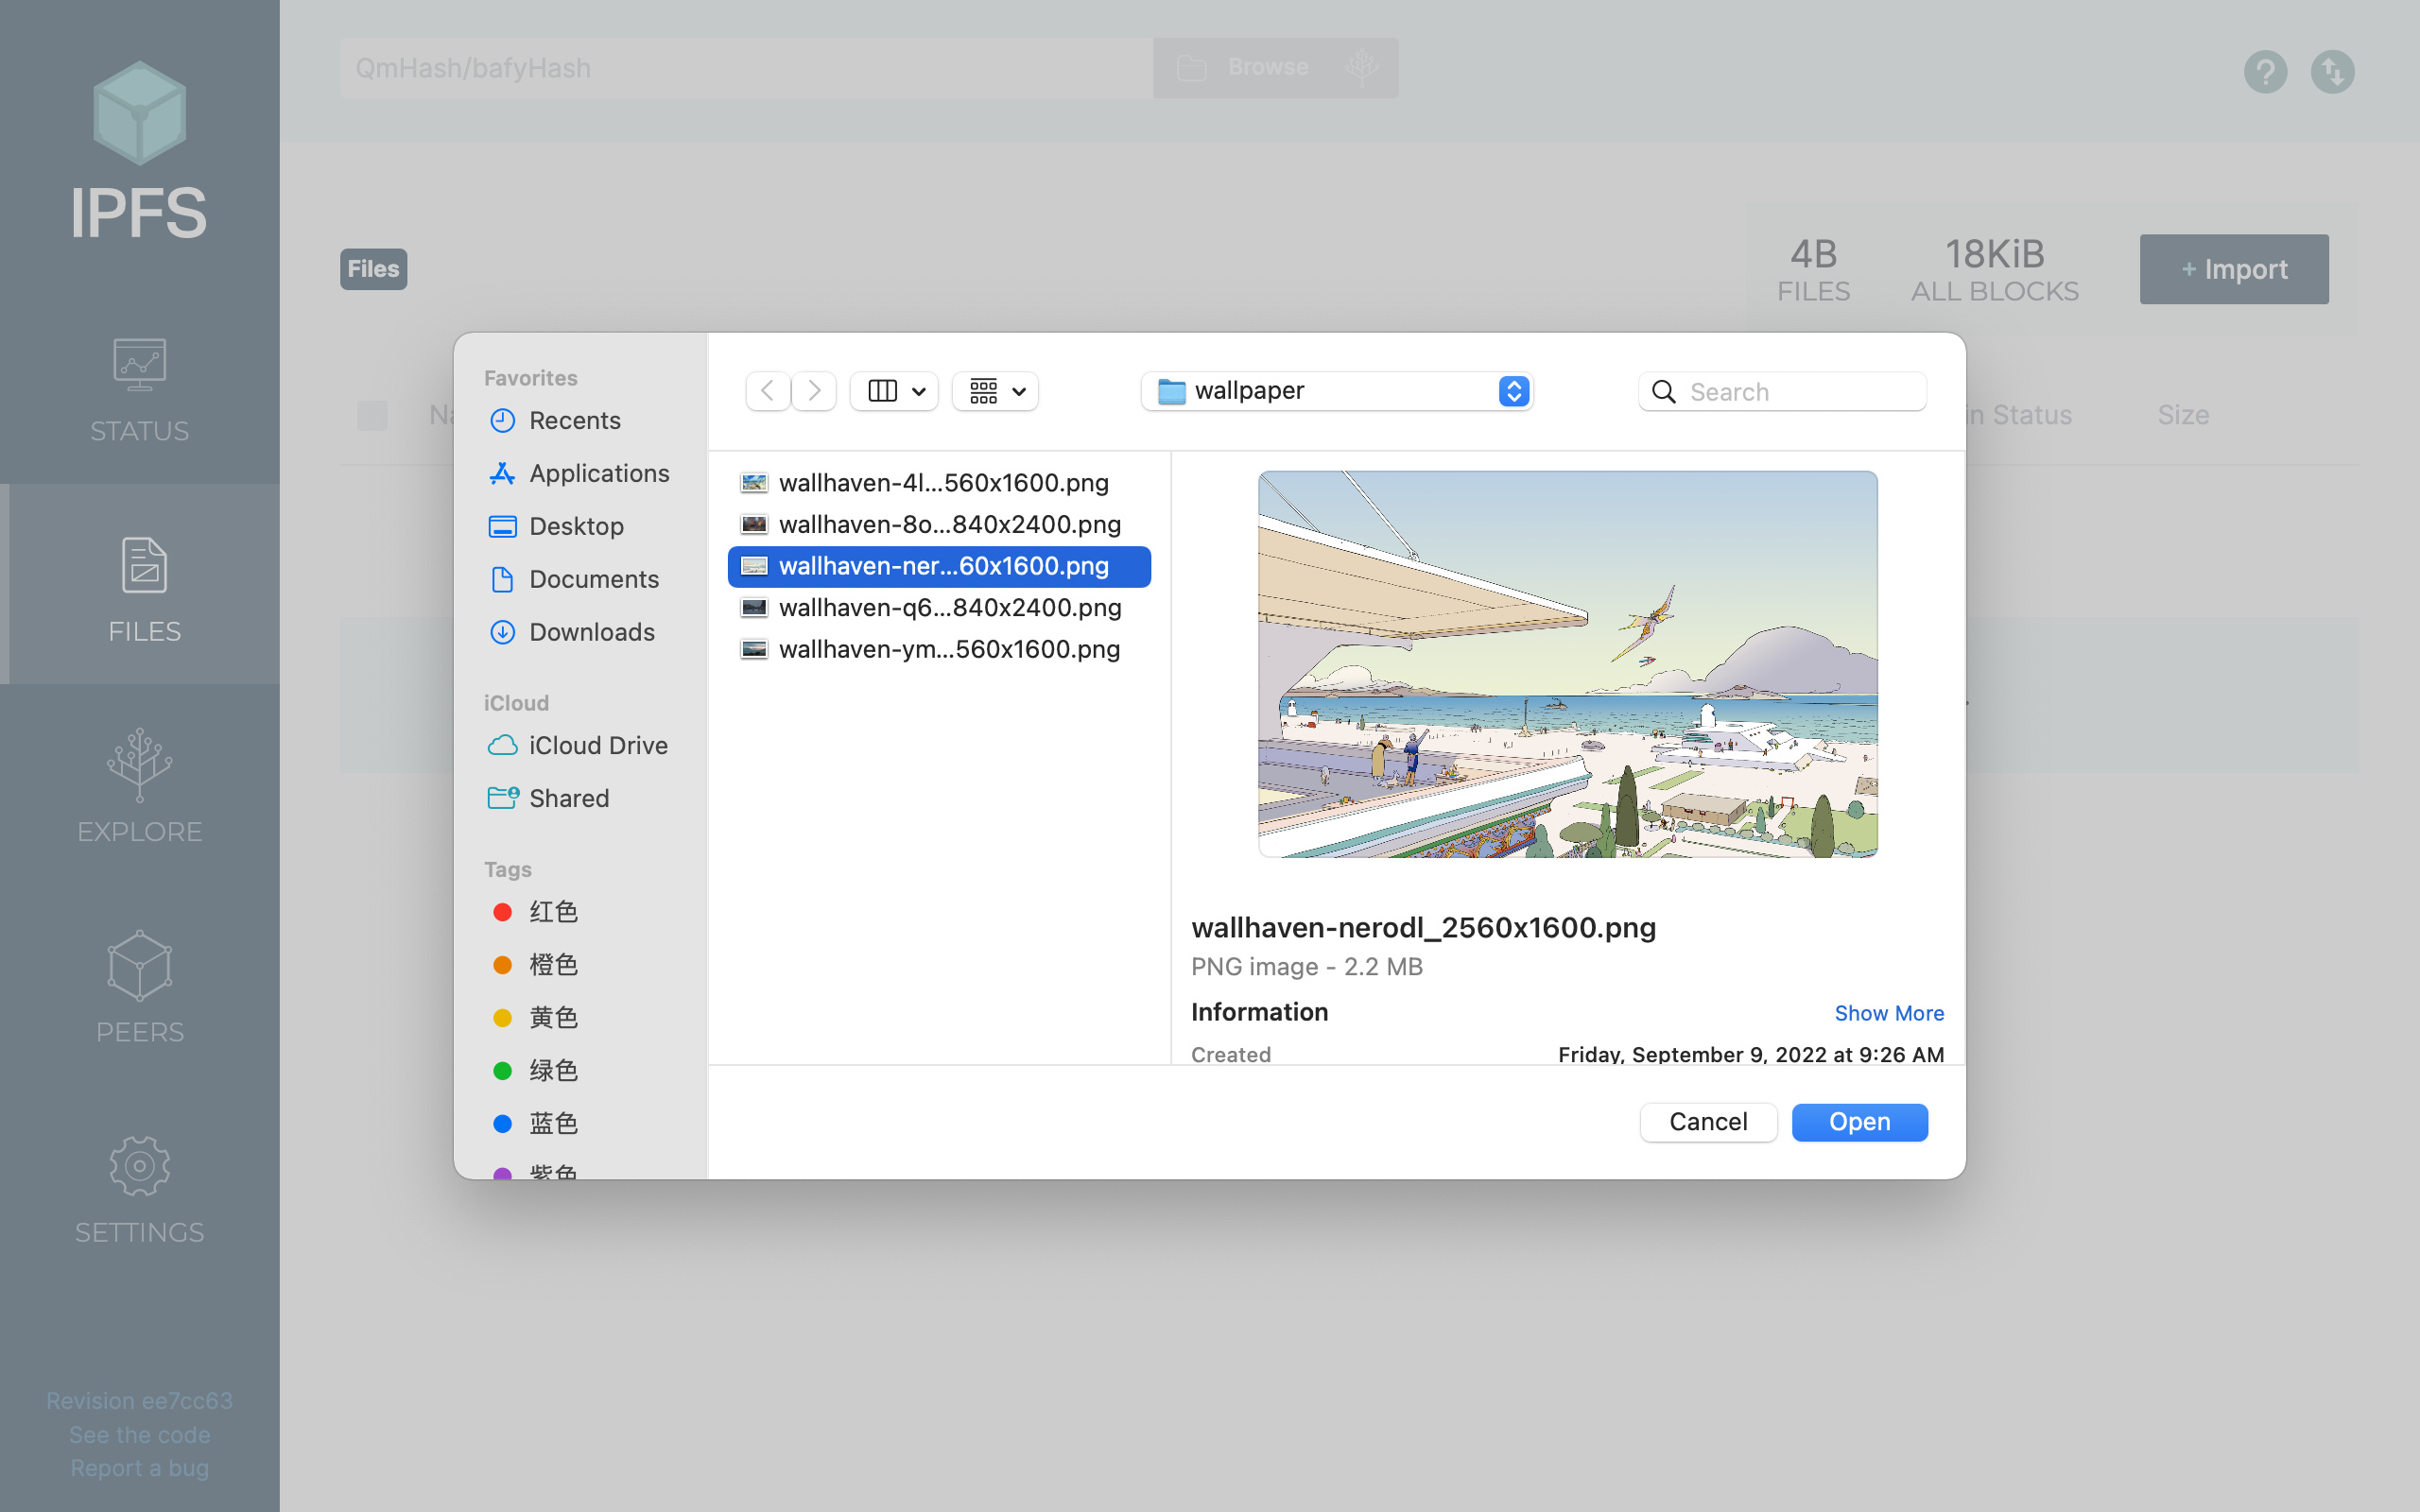
Navigate to the file which you want hosted and open it
-
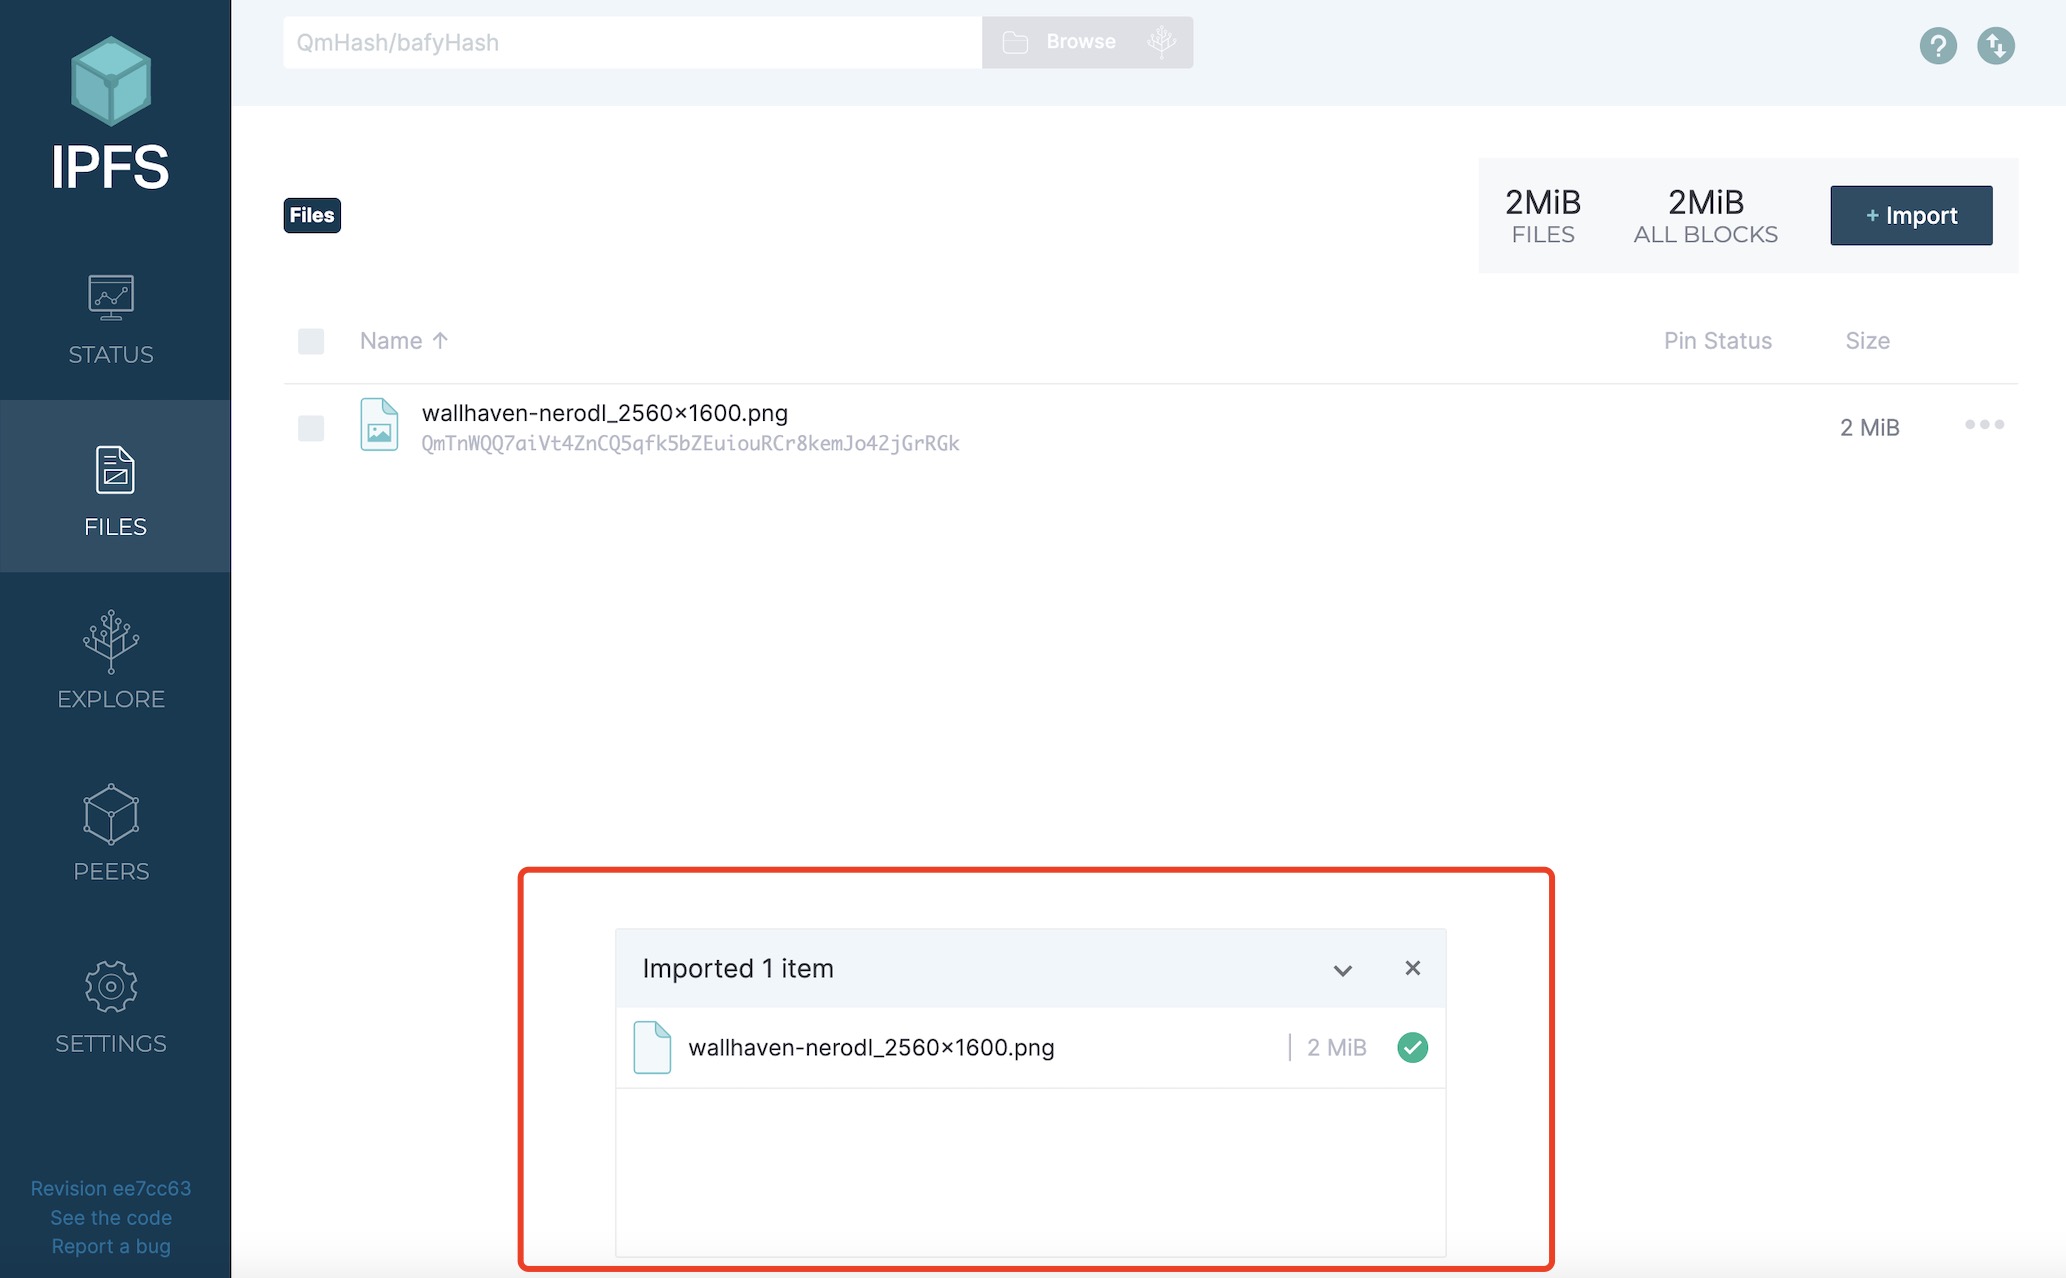
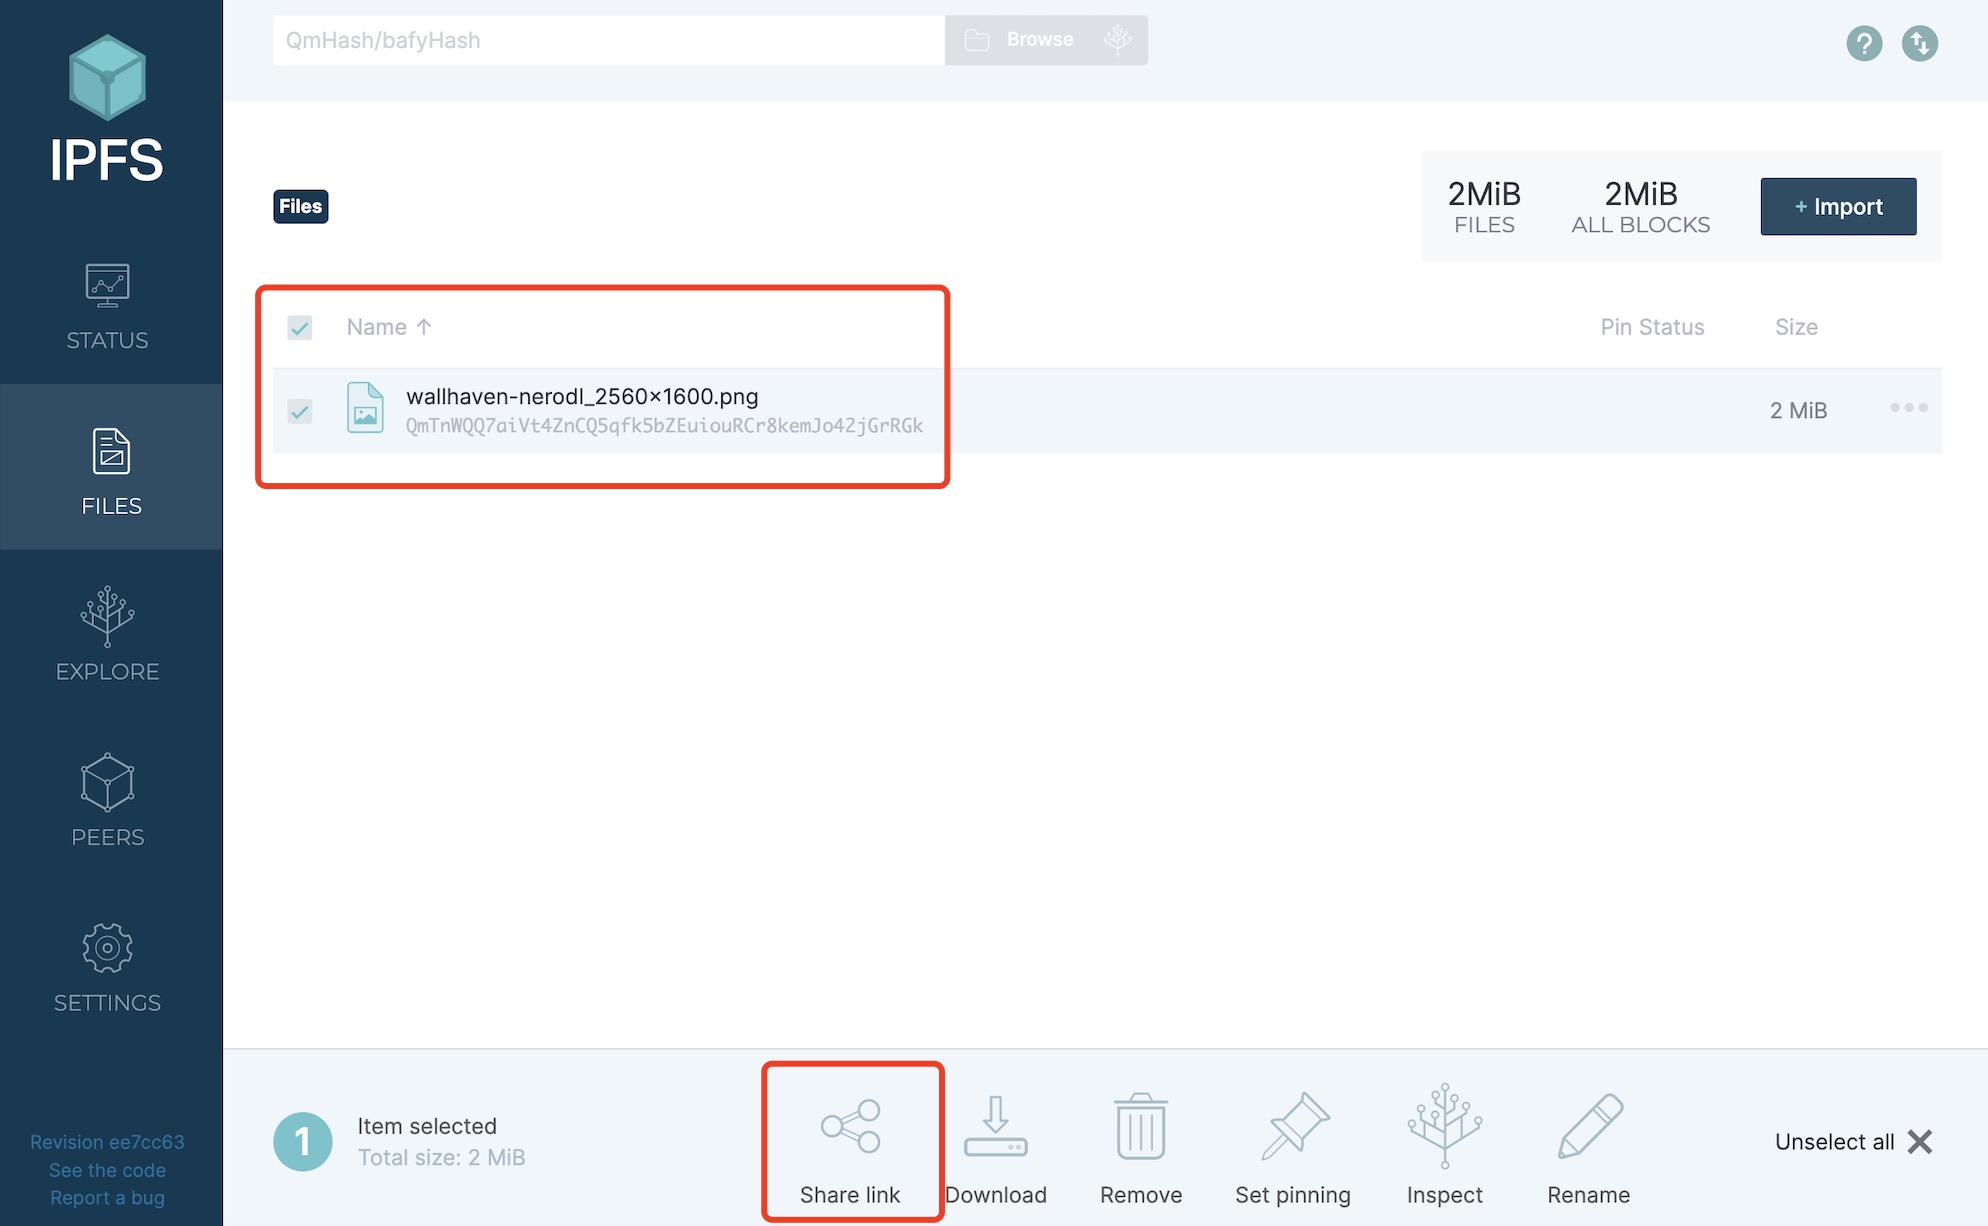
Check the import progress. After importing is completed, you can see the following notification at the bottom of the files page:
-
Select the file you just imported and select “Share link”
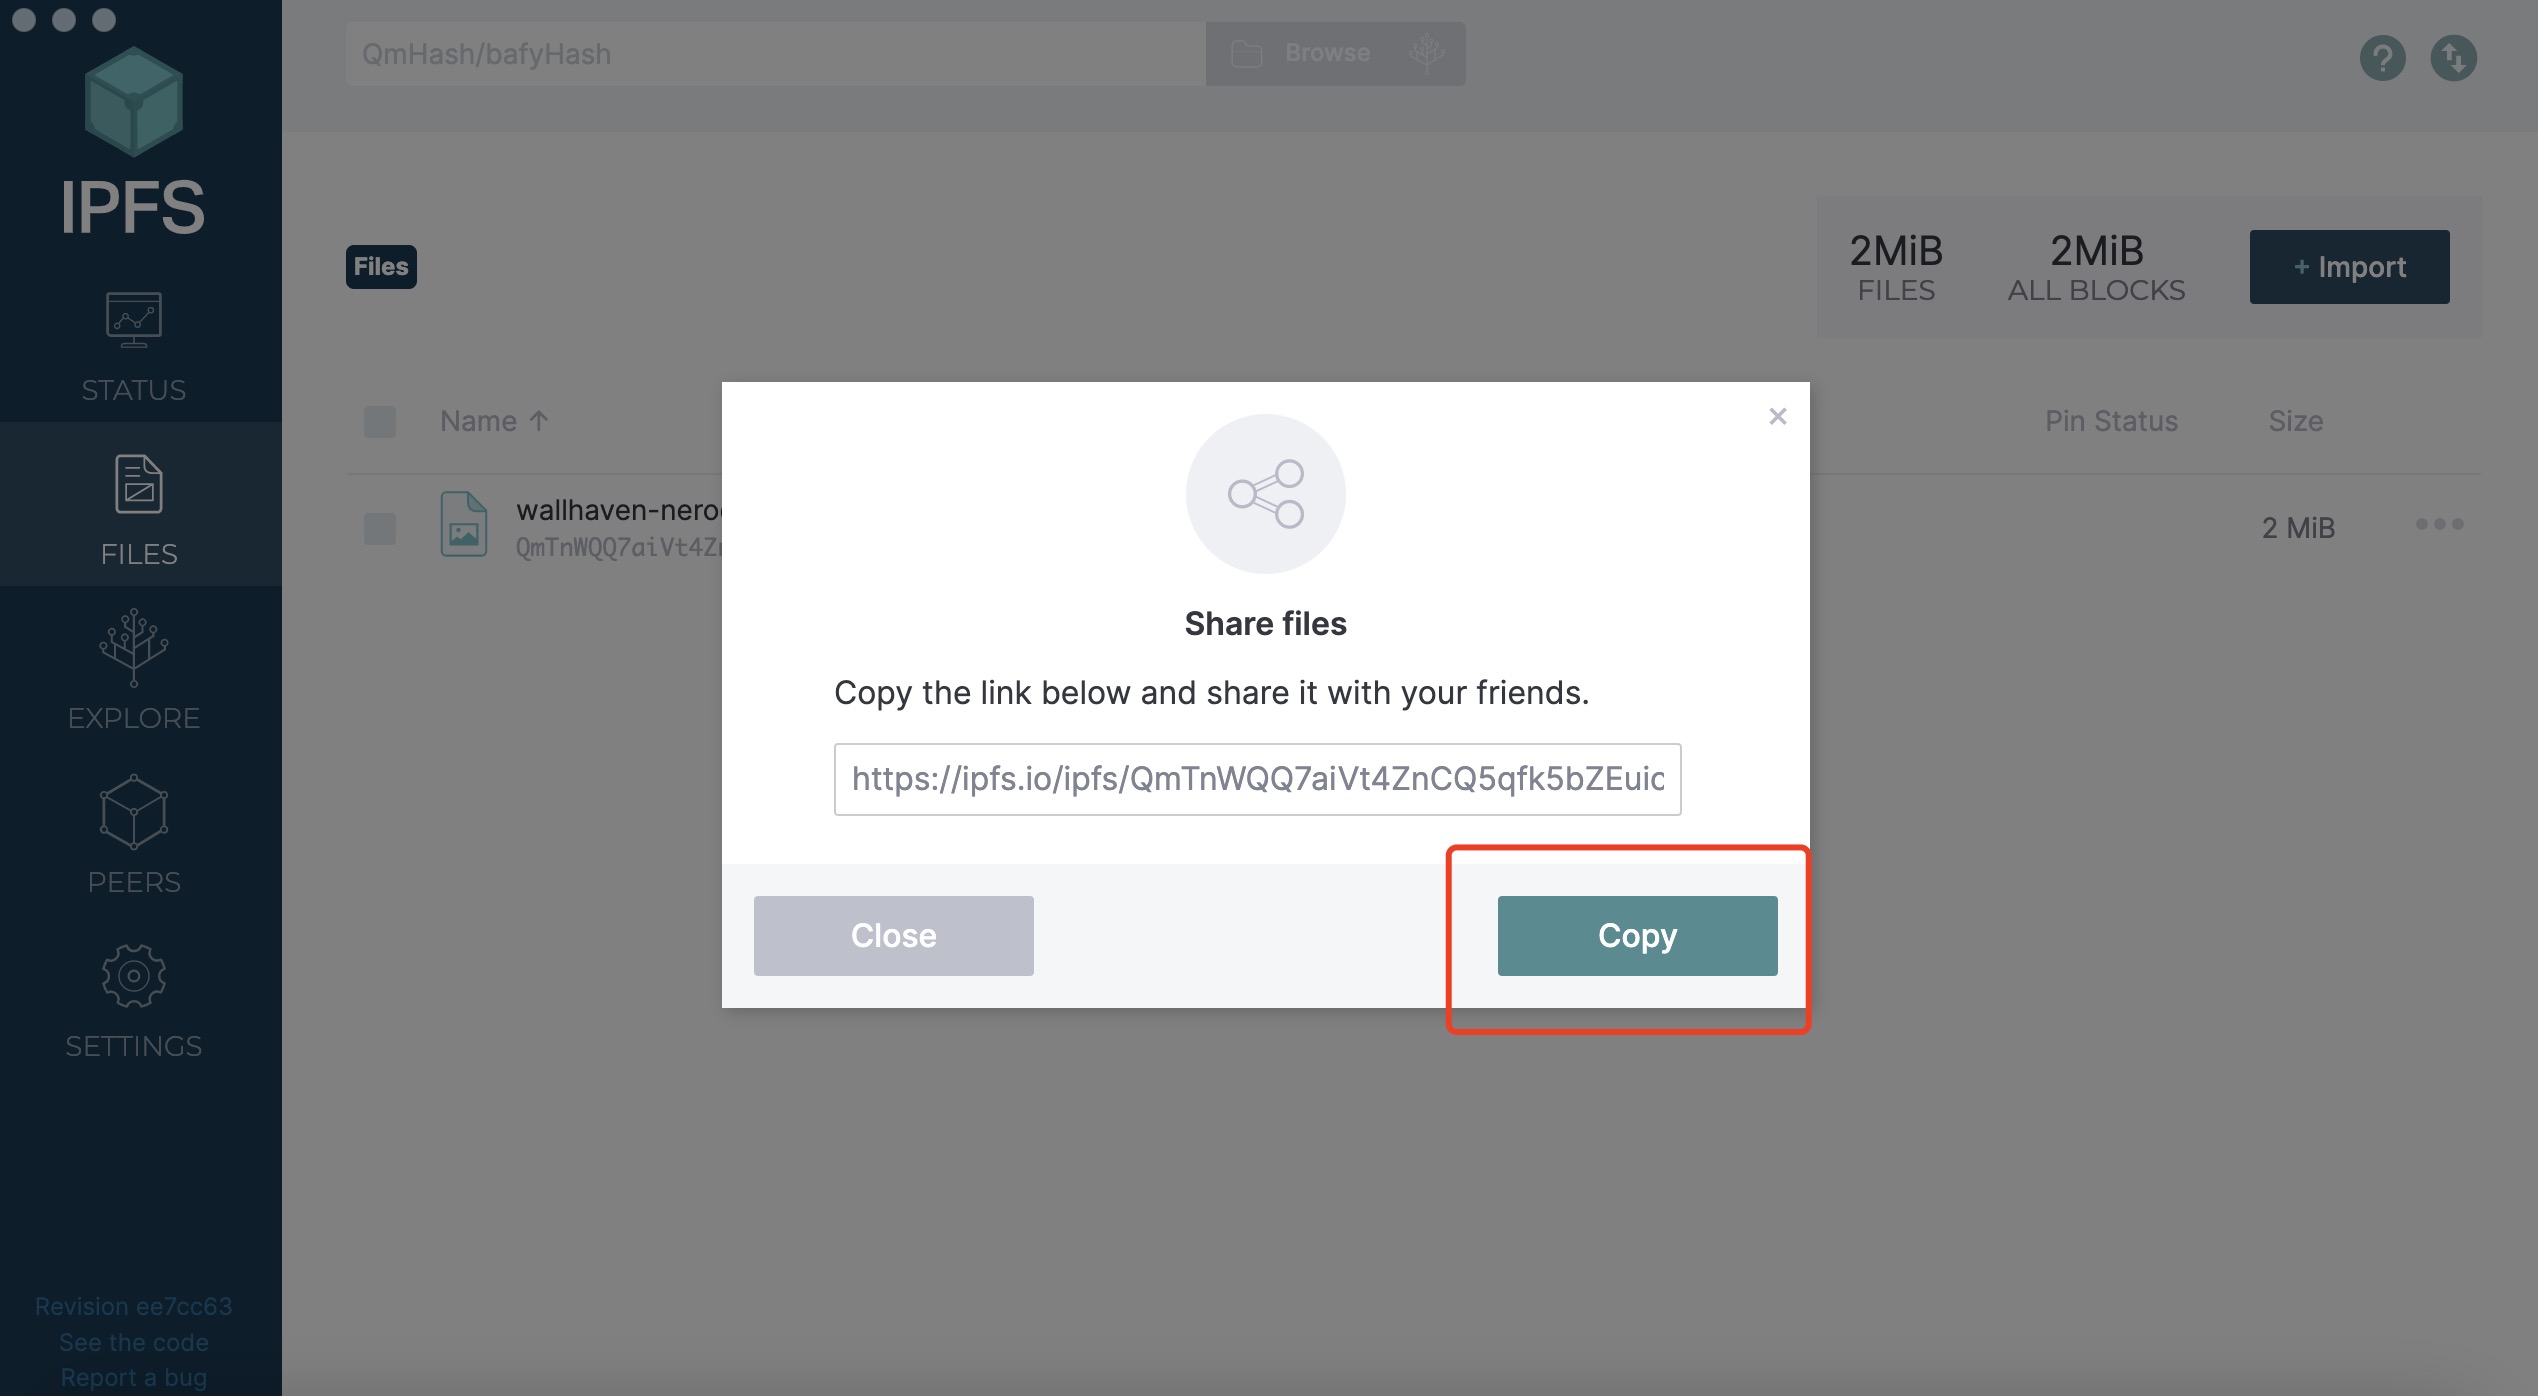
-
Select “Copy” in the pop-up box to copy the file’s URL to the clipboard. Default URLs use https://ipfs.io gateway, which can be modified on the configuration page.
-
Open your browser, paste the URL you just copied and access the file.
Reminders:
-
The uploaded files are saved in your local IPFS node and can be accessed by other nodes. Accessing via URL requires the nodes that provide public network management service to search for files in the entire IPFS network until your node is found, and your IPFS node must always be online. -
IPFS Desktop does not support displaying files uploaded via API. If you choose to call API to upload files, it is recommended to save the uploaded results.
Accessing files from IPFS network
To access a specific file from someone else’s IPFS node, you must first know the CID (Content Identifier) of that file. The CID is a hash based on the content uploaded to the IPFS node.
-
Select "Import" on the files page and then select "From IPFS"
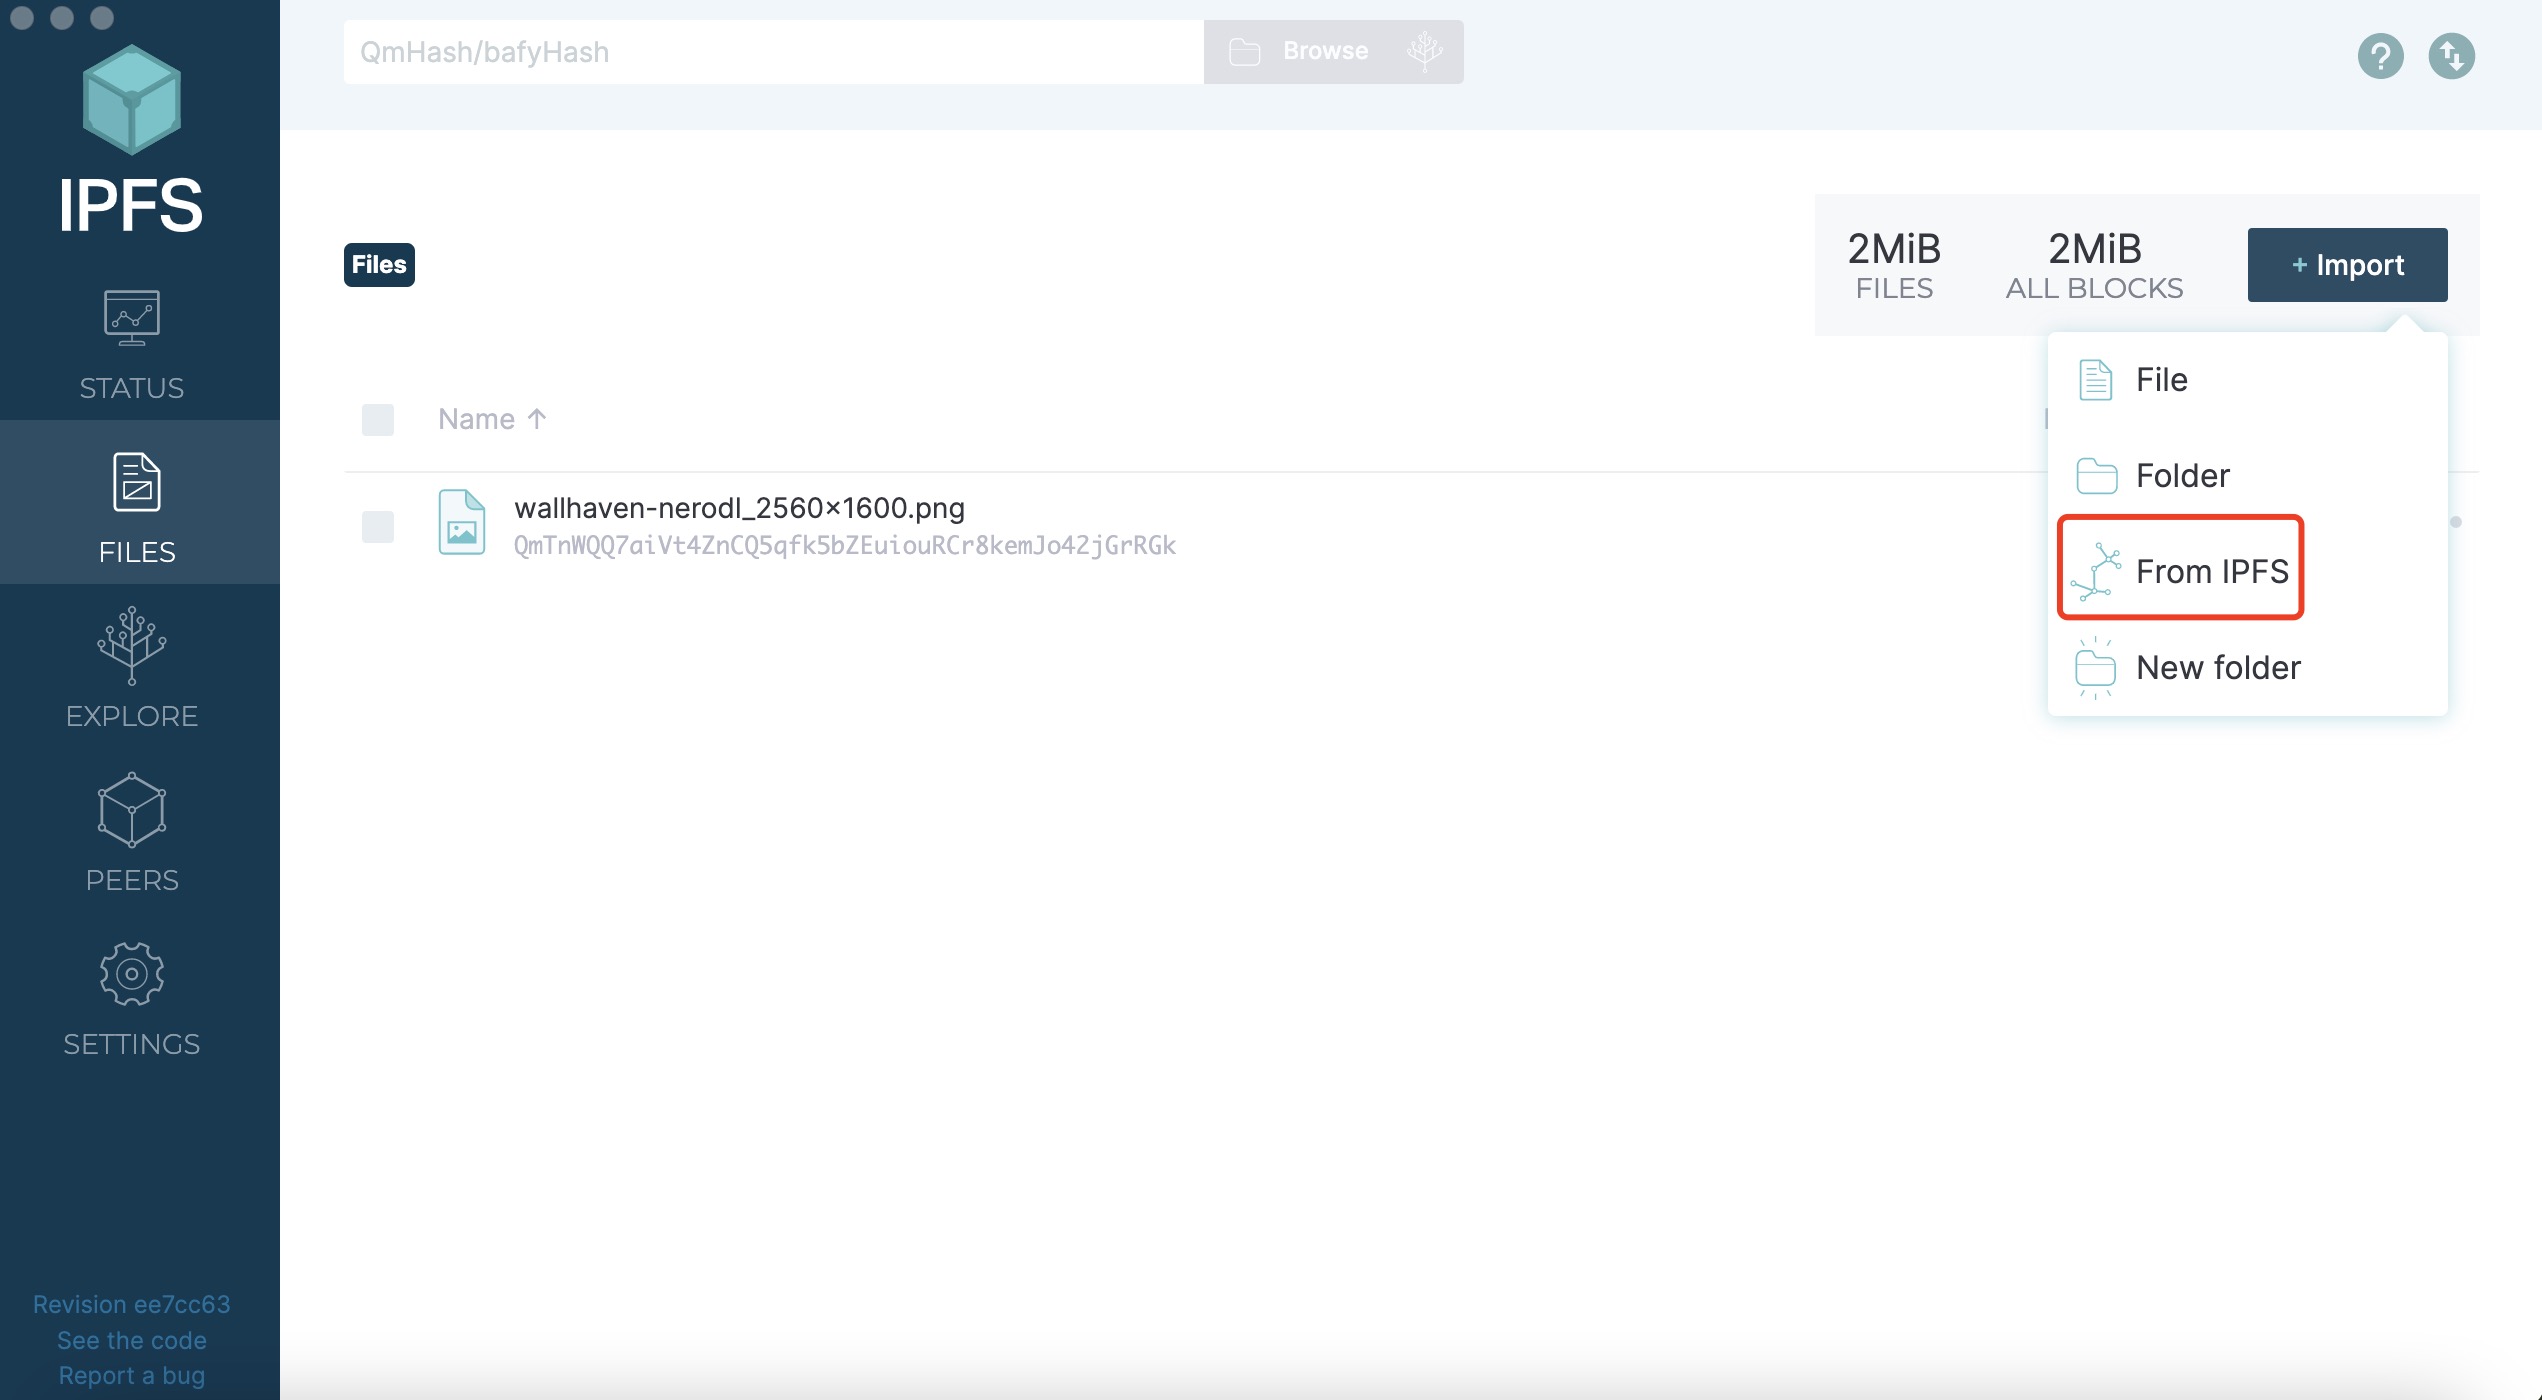
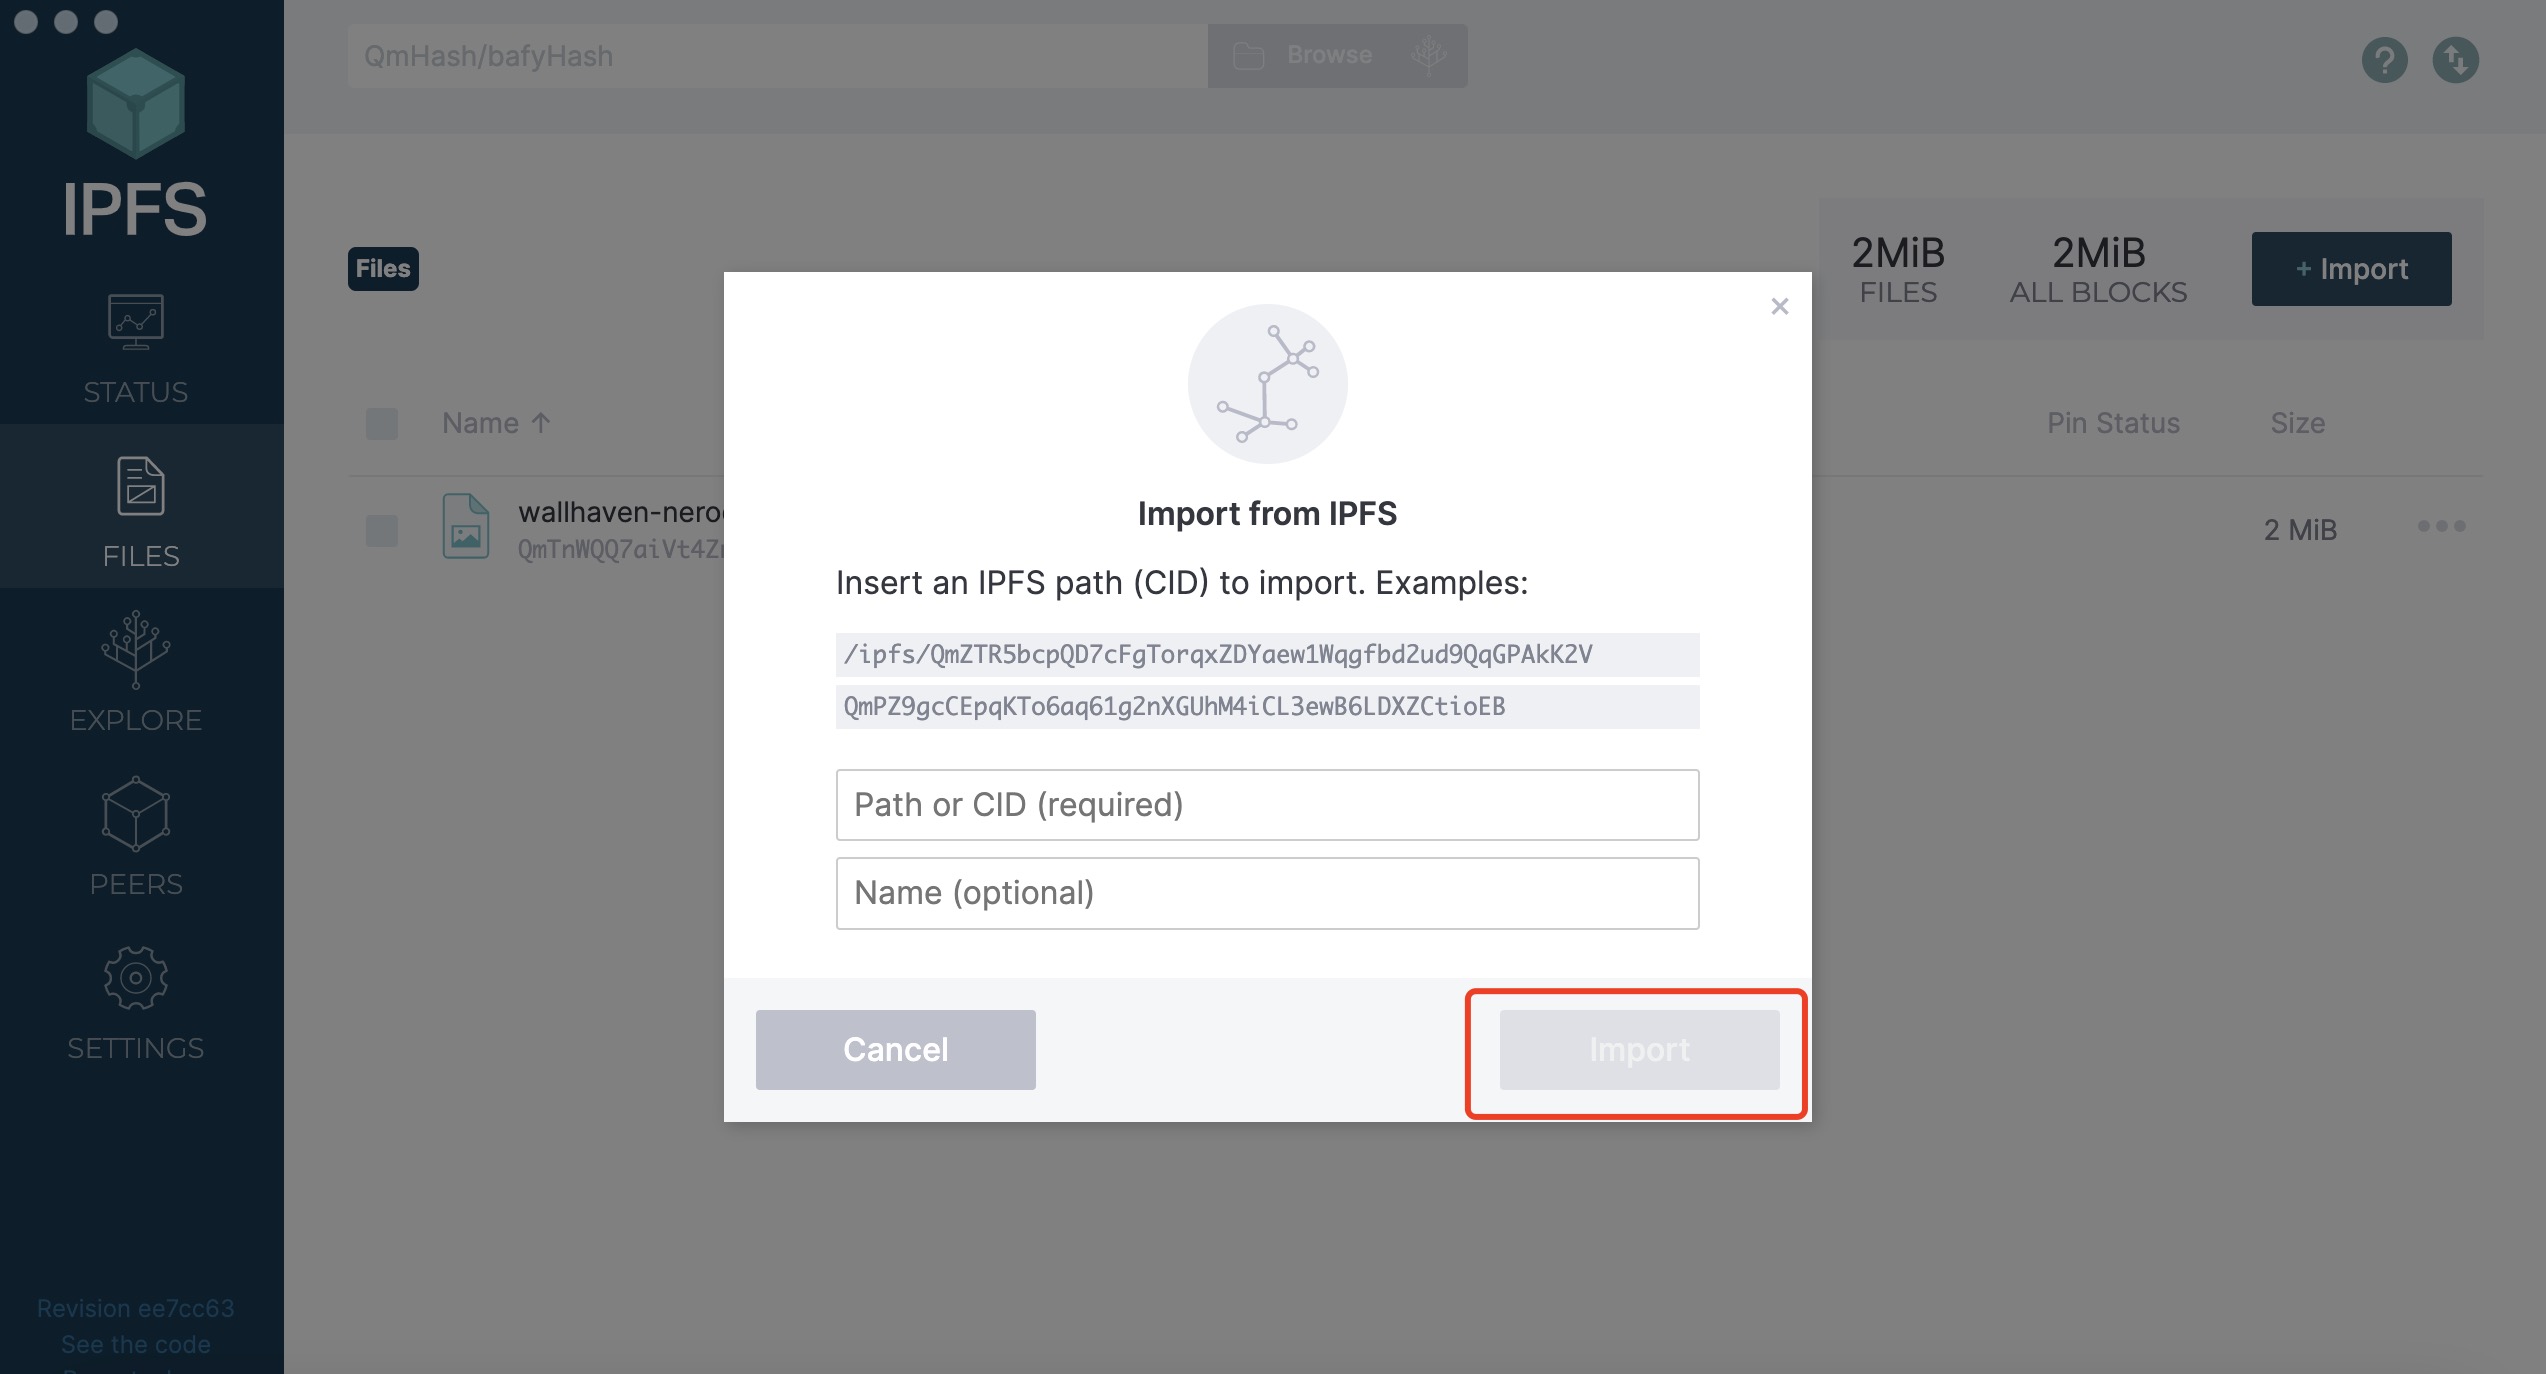
-
Copy the CID shared to you by others to the input box, and select “Import”
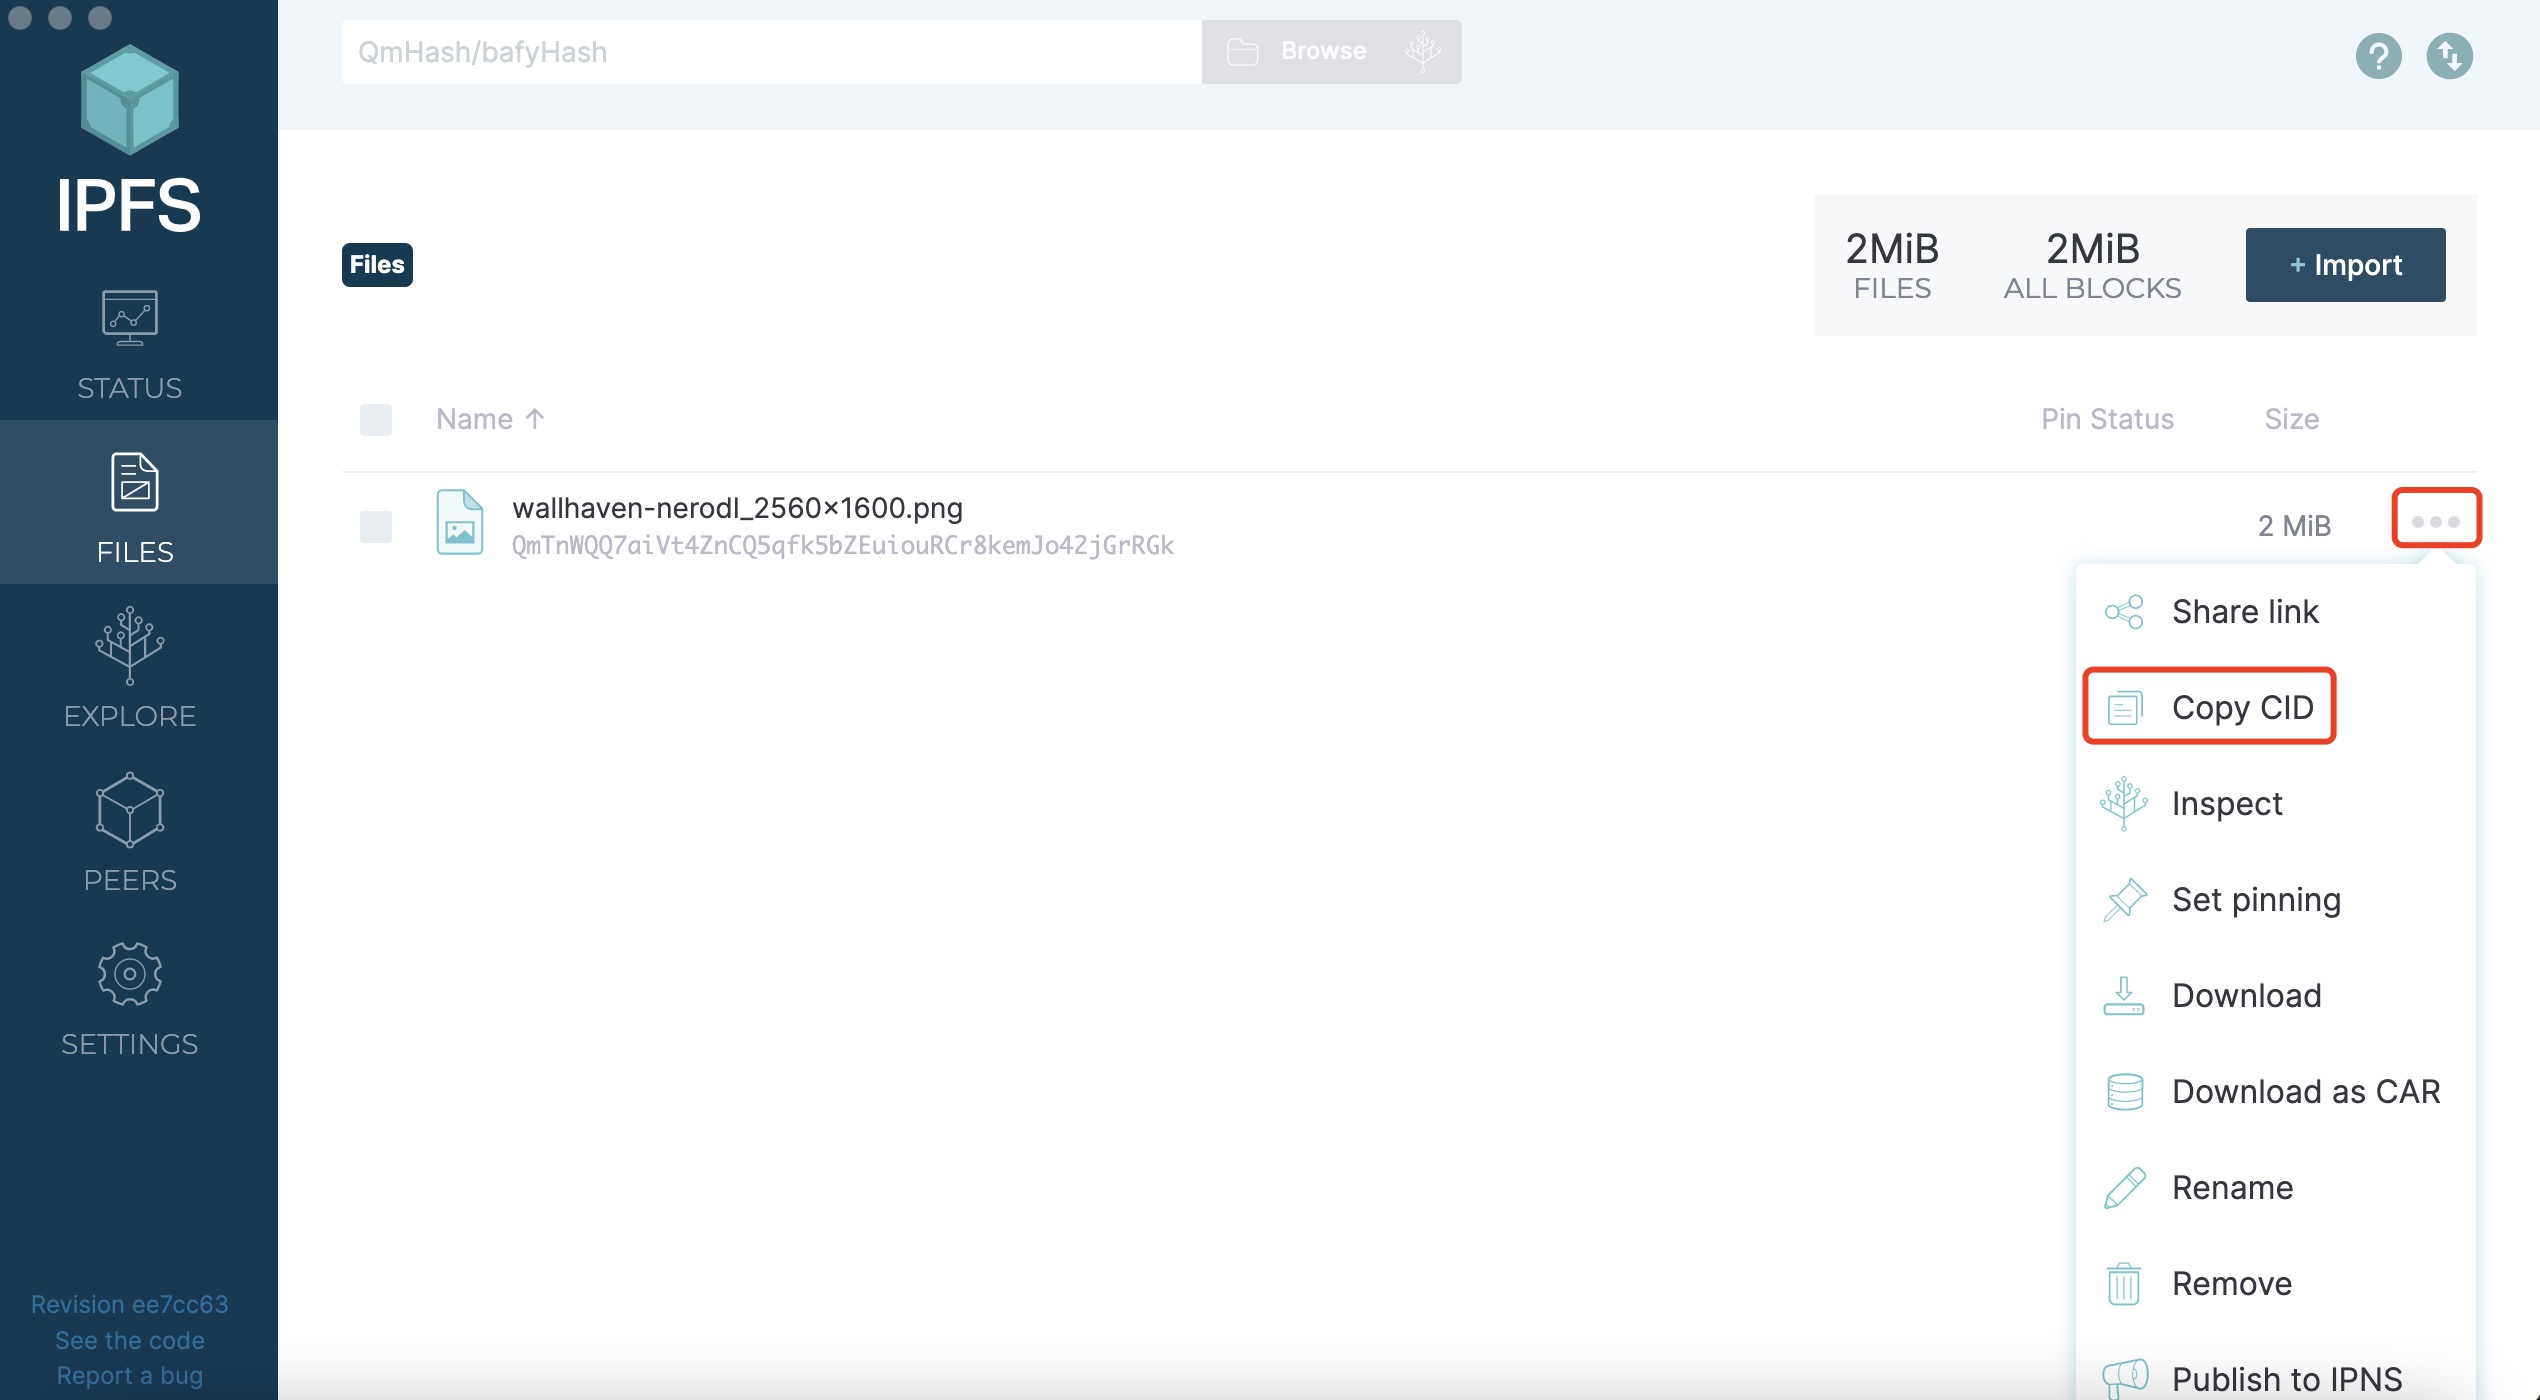
Sharing files via CID
On the files page, click the icon with three dots on the right of the file you want to share, and select “Copy CID”
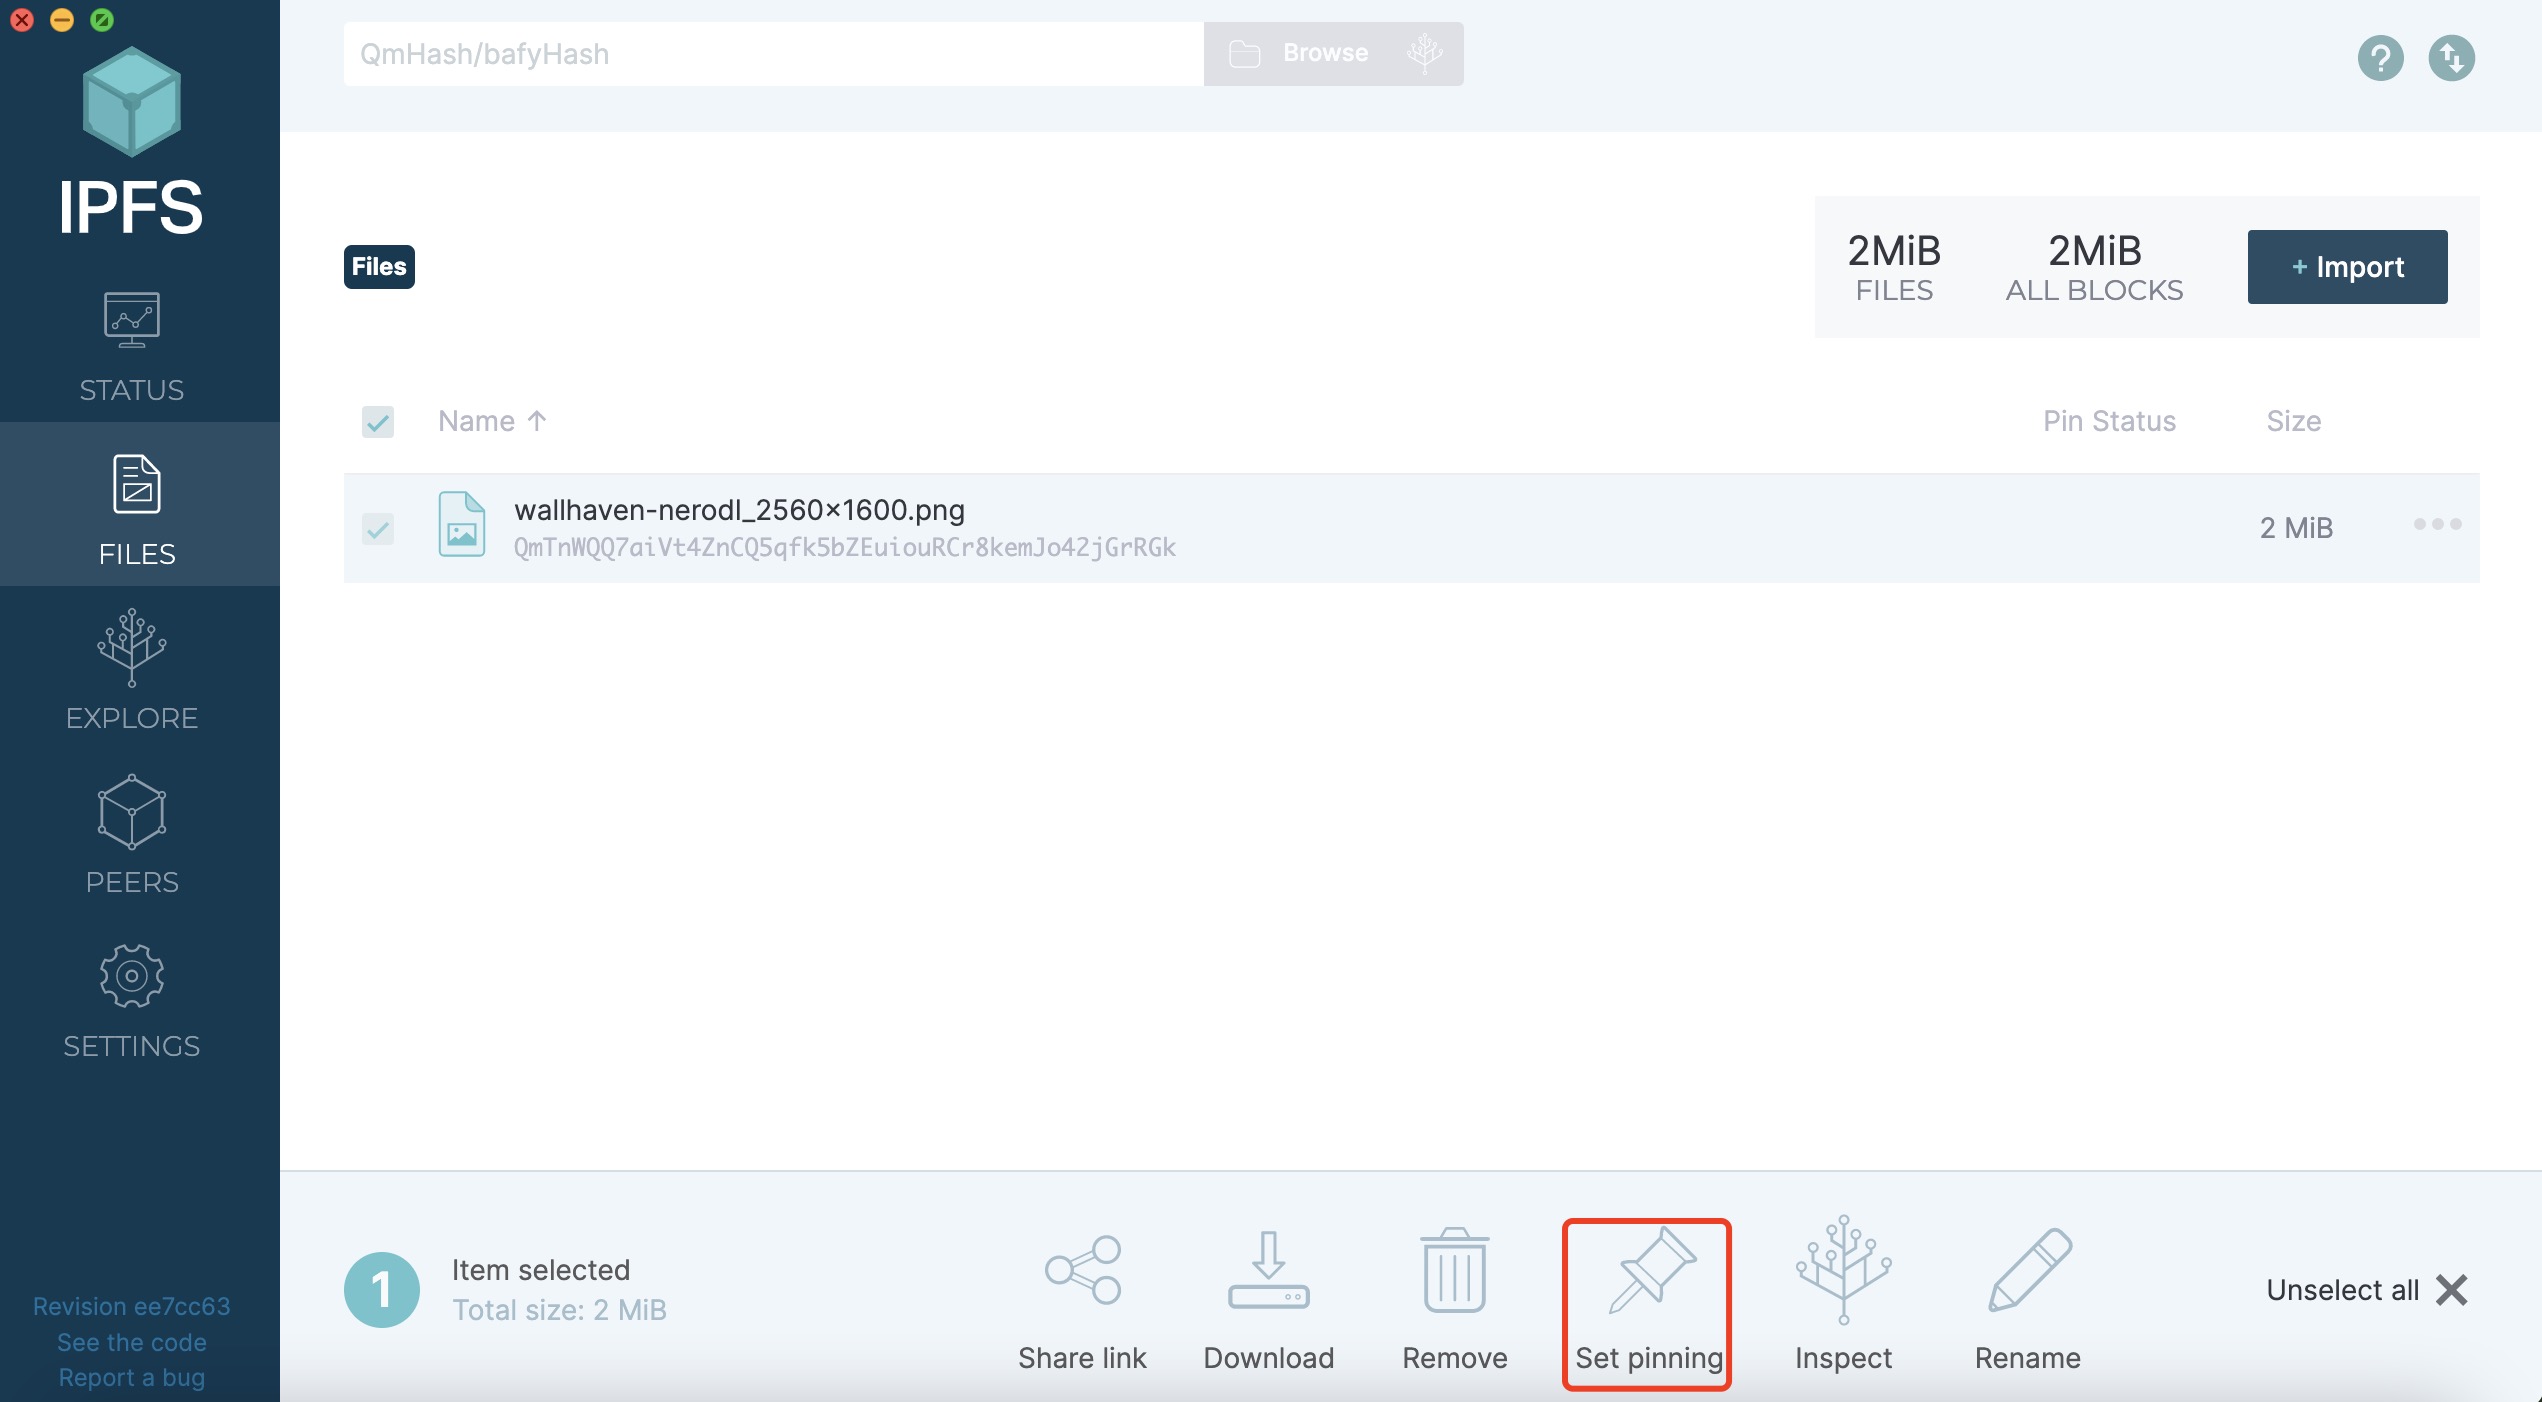
Pinning files
IPFS nodes regard the data they store as a cache, which means that the files you uploaded may be garbage collected instead of permanently stored. Pinning files tells the IPFS nodes to consider the data as necessary rather than discard it. On IPFS Desktop, enter the Files page, select the file to be pinned, and then click “Set Pinning”:
The operations above can save the files on your local IPFS node “permanently”. However, if you want to ensure that your files can still be accessed when the local node is offline, you can choose to use IPFS Collaborative Clusters or the Pinning Services.
The Pinning Services
A simple way to save important data using IPFS is to use the pinning services. These services run a large number of IPFS nodes. Files pinned via these services can be easily searched by other nodes and accessed by users via the public gateway. The advantage of using the pinning services is that you do not have to run and maintain your own IPFS node, but some pinning services may have a relatively higher threshold for use. A list of pinning service providers has been officially maintained. In this tutorial, we will use Pinata. It provides 1GB of free storage space for new users and is very easy to use:
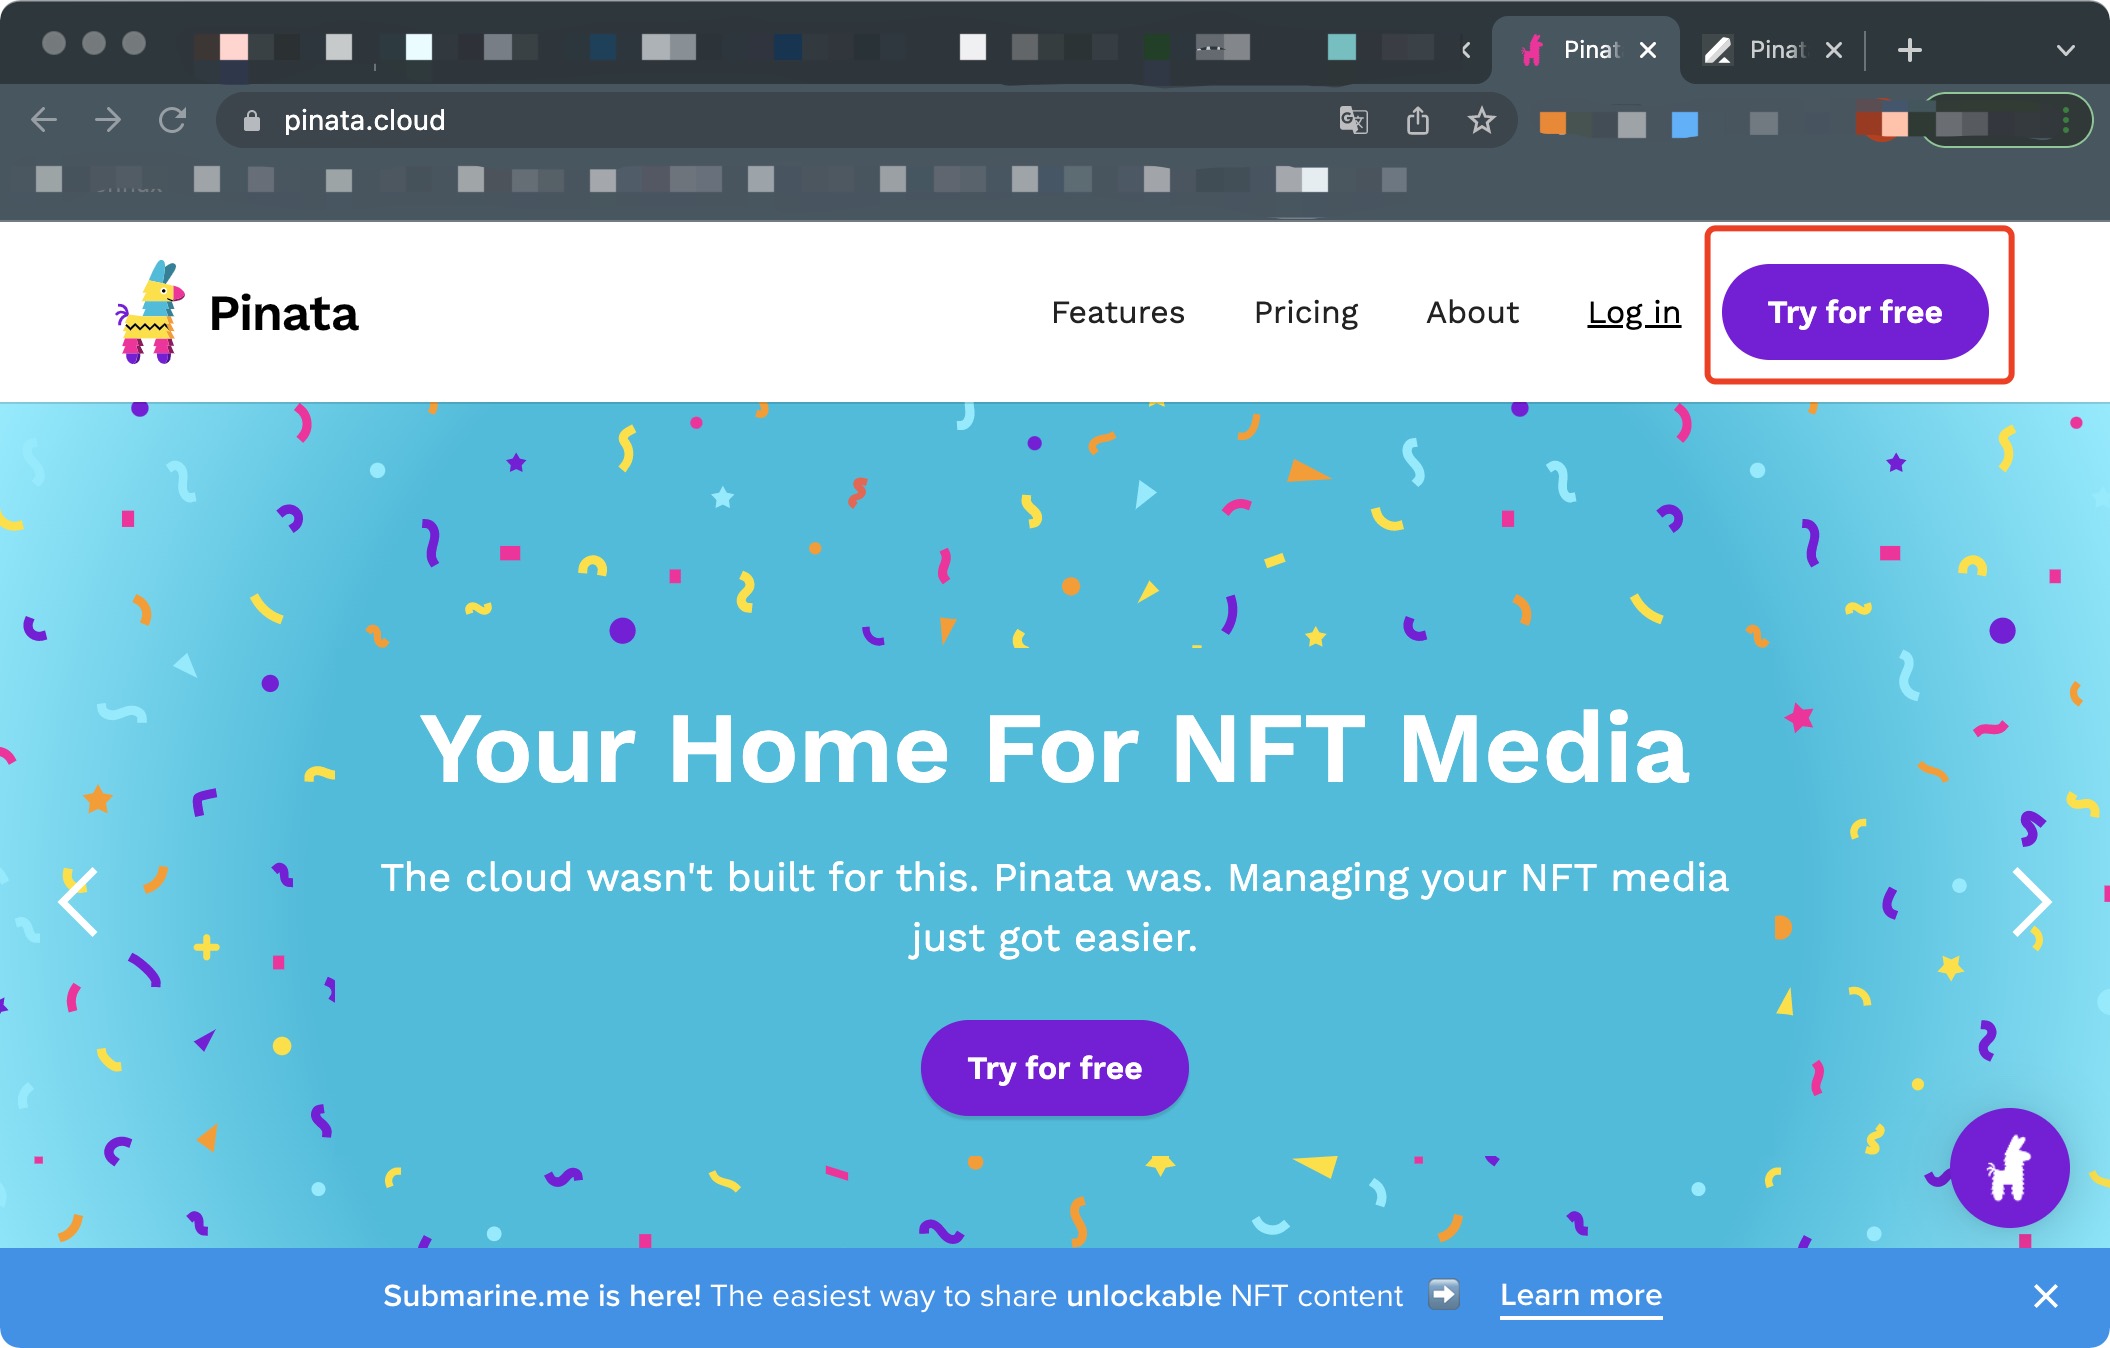
-
Enter the homepage of Pinata and select “Try for free” to register
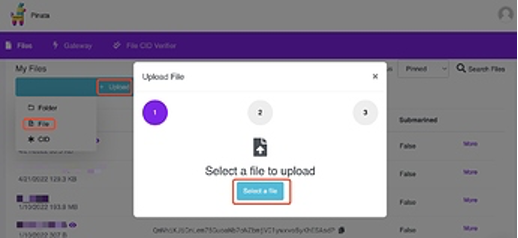
-
After registration, log in to the personal homepage. Select “Upload ->File ->Select a file” and select the file you want to host to the IPFS network
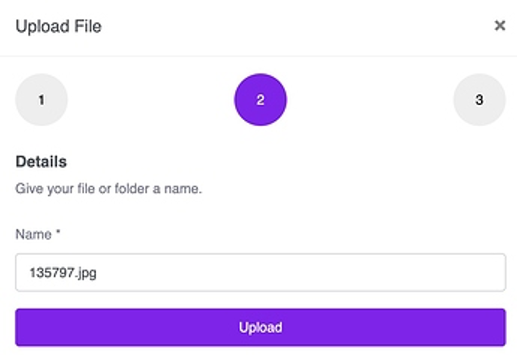
-
Select “Upload” and wait for the file to be uploaded to the node maintained by Pinata
-
After uploading, you can see the pinned file and its CID in the files list on the homepage
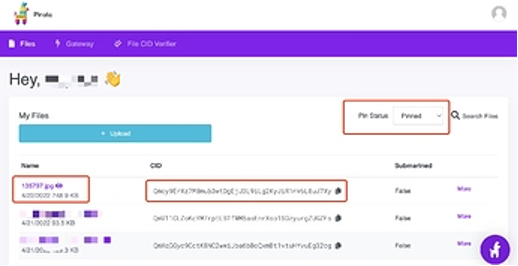
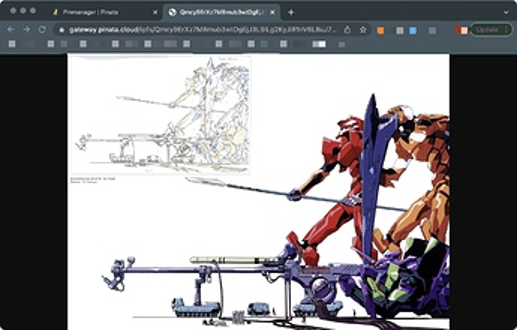
-
Click the name of the file to view the uploaded file in the browser via Pinnata gateway
Reminders: Pinata provides a 1GB free quota, and the exceeding part requires to pay. You might consider using NFT.Storage, which is used in a similar way to Pinata. This is a free decentralized storage service maintained by Protocol Labs, the development team of the IPFS protocol. See Introducing NFT.Storage: Free Decentralized Storage for NFTs: https://filecoin.io/blog/posts/introducing-nft.storage-free-decentralized-storage-for-nfts/ for details.
Maintaining your own IPFS node and public gateway on the server
For IPFS nodes running locally, the files stored in them are difficult to access via the public gateway, and once the node is offline, the files cannot be accessed.
If you need to save a large number of files or data and want them to be quickly accessed anywhere, you can consider deploying IPFS on the server and maintaining a public gateway so that users can access the files saved in the IPFS node on the server via the HTTP protocol of the browser.
Check this post to learn how to quickly set up your own IPFS gateway:
What is IPFS gateway
The IPFS gateway allows visitors to access data from the IPFS network via HTTP requests. By default, the IPFS gateway is configured on port 8080, and the data will be obtained from the server running IPFS in the following ways:
http://{your_ip_address}:8080/ipfs/{content ID}
or
https://{gateway URL}/ipfs/{content ID}/{optional path to resource}
More detailed introduction to the IPFS gateway: https://docs.ipfs.io/concepts/ipfs-gateway/#overview
This tutorial configures an IPFS gateway on a Google Cloud platform: https://blog.stacktical.com/ipfs/gateway/dapp/2019/09/21/ipfs-server-google-cloud-platform.html
Other reference links:
Introduction to IPFS: Run Nodes on Your Network, with HTTP Gateways: https://rossbulat.medium.com/introduction-to-ipfs-set-up-nodes-on-your-network-with-http-gateways-10e21ea689a4
Cloudflare IPFS gateway: Setting up a Server: https://developers.cloudflare.com/distributed-web/ipfs-gateway/setting-up-a-server/