
You need to follow the 3 steps below to start your new PoS node.
1. Install ConfluxPortal
Reference: ConfluxPortal v0.6.10 Upgrade Tutorial
If you have installed ConfluxPortal, jump to Step 2.
2. Start Fullnode
Version: Conflux v2.0.0-testnet
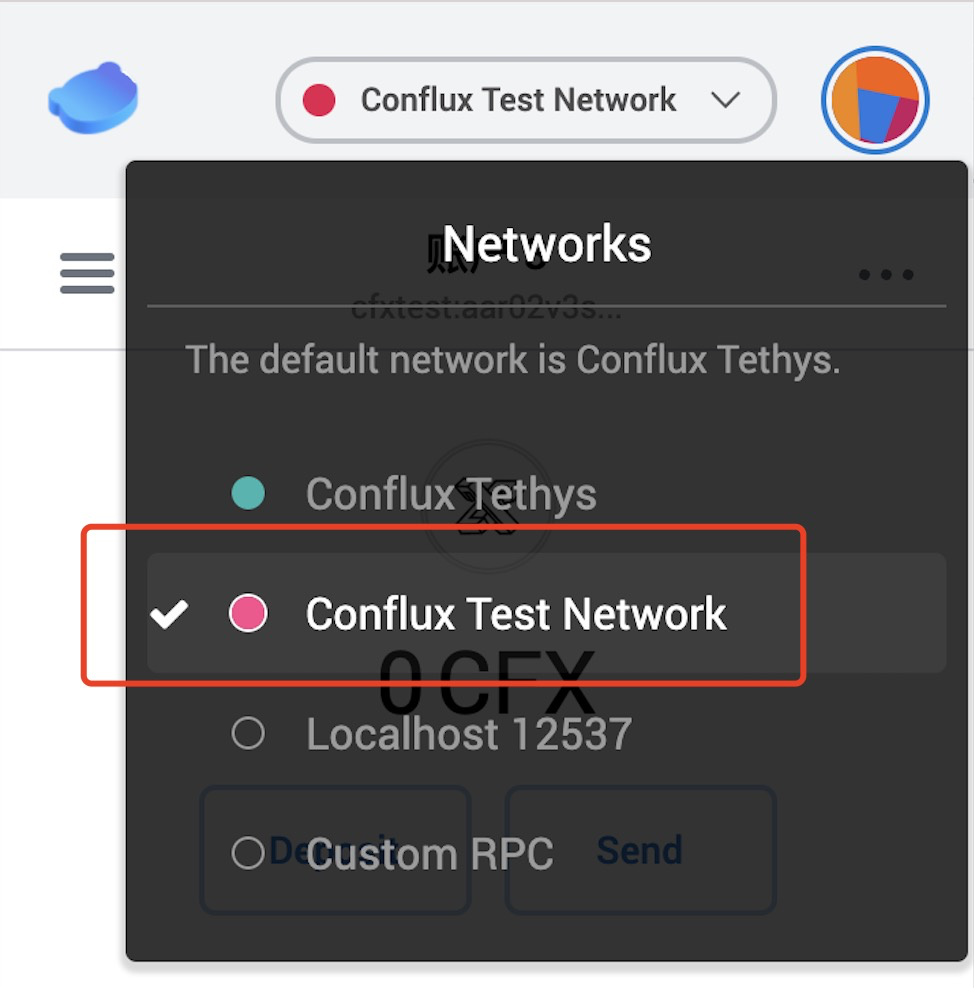
1. Network setting
Switch blockchain network to Conflux Test Network
2. Set configuration of the fullnode program
Running test notes on Windows:
- We recommend you to close your anti-virus software(including Windows Defender)
- Your Windows 10’s version must be 1903 or higher
You need to download the following files:
Fullnode GitHub download link:
Preparation of running full node program:
- Create a directory named conflux
- Extract the download package to the directory
- Download the
pos_configpackage and move the decompressed folder to therundirectory
 The directory structure should look like this:
conflux
└── run
    └── pos_config
    └── conflux.exe
    └── conflux.pdb
    └── testnet.toml
    └── log.yaml
    └── clear_state.bat
    └── clear_state.sh
    └── libcrypto-1_1-x64.dll
    └── libssl-1_1-x64.dll
    └── start.bat
    └── start.sh
    └── throttling.toml
Configuration set-up instructions
You need to edit testnet.toml file in order to set up the configuration.
# mining_author="cfxtest:xxxxxxxxxx..."
Please edit “cfxtest:xxxx…” and set it to your own wallet address. (starts with cfxtest:)
Delete “#” before “mining_author…”
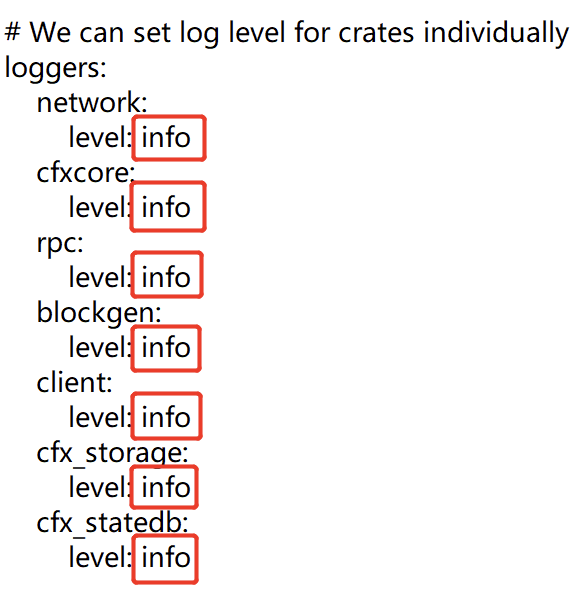
3. Turn on the test mode
Open the log.yaml file and find the commands shown in the following figures, replace all the “info” with “debug”, then save the file.
The command should look like this after edition:
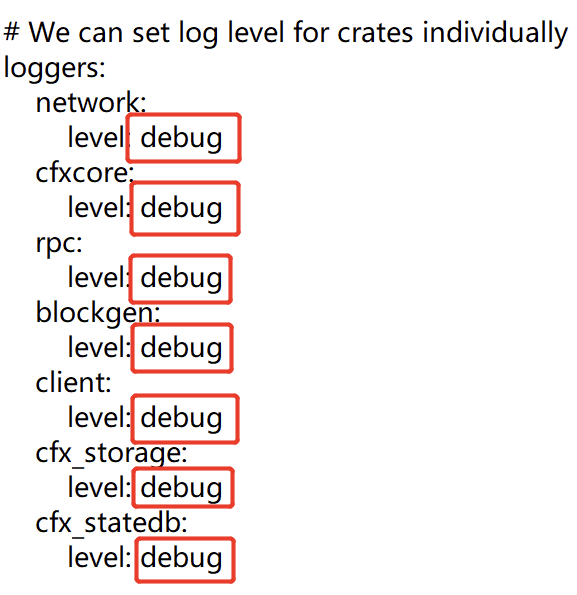
4. Run the full node program
Double click start.bat document, start Fullnode.
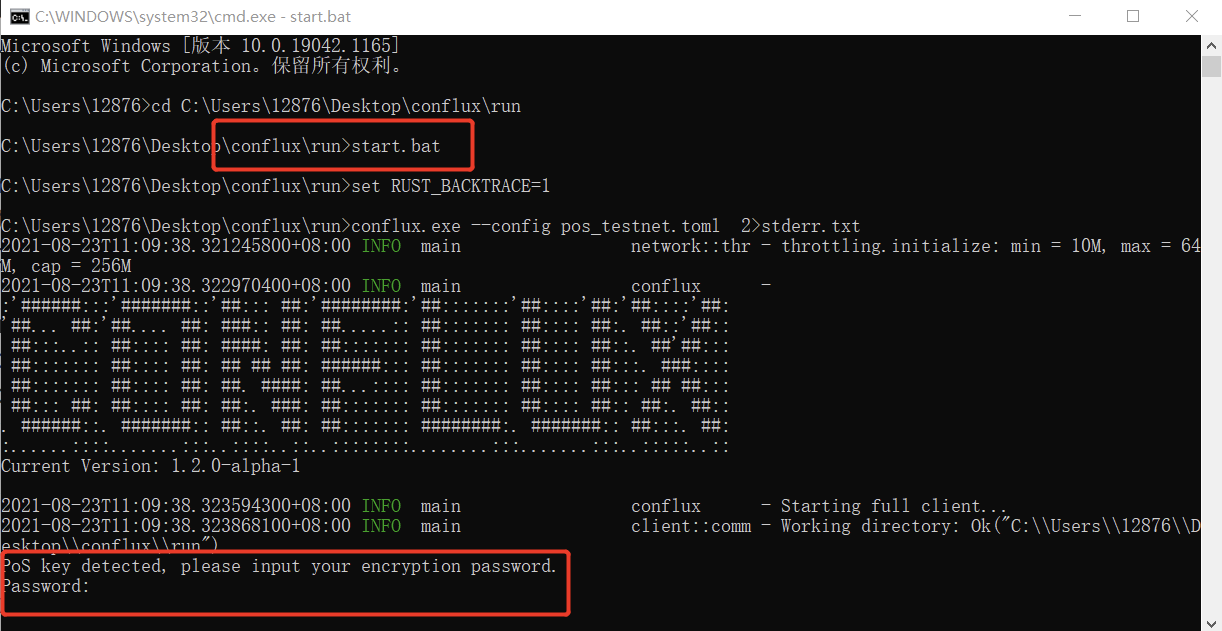
Noye: here you need to enter the password and confirm it:
Some may not be able to start the program. If the startup fails, please replace the compatible version of the program for testing. The download link is the same as above.
3. PoS Registration:
Staking
Access testnet-governance.confluxnetwork.org in the browser and connect your Portal(using the Conflux Testnet).
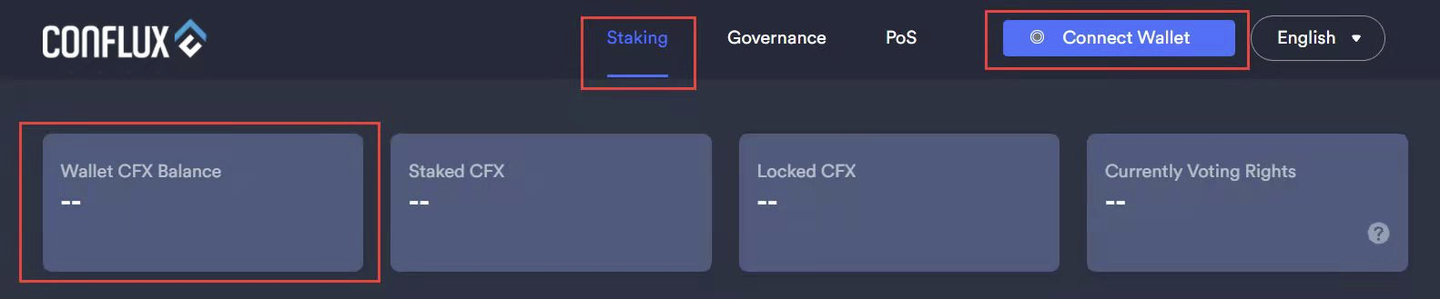
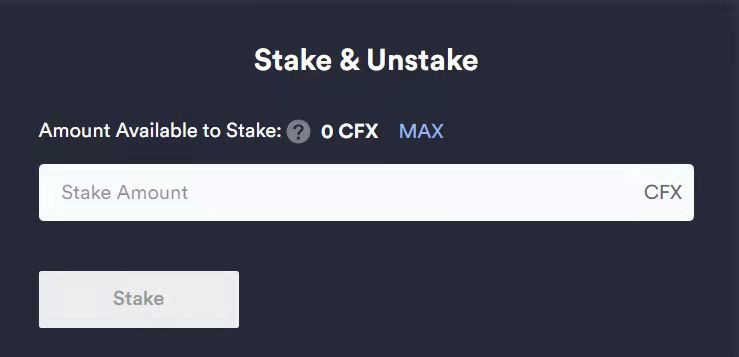
Choose the staking CFX amount (at least 1000). Then click “Stake”. This action needs to be confirmed in the portal.
Registration
After staking, choose PoS here.

Right-click the “Start” icon on the left corner of your screen and then press “Windows PowerShell”;
Copy the directory path of the run directory using right-click. Enter cd + space + the directory path you copied in Powershell.
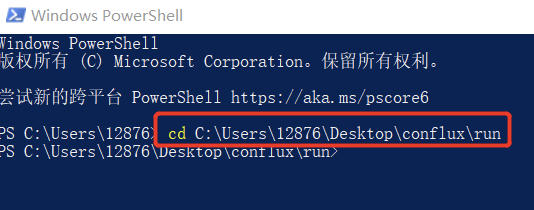
And then run the command:
./conflux rpc local pos register --power 1

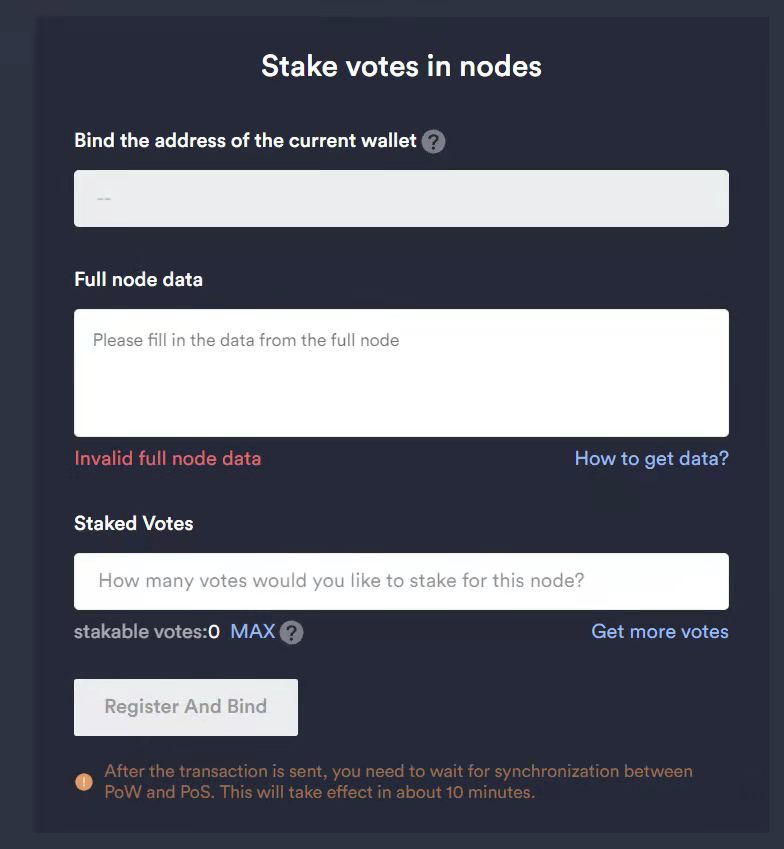
The first returned value is the data field required when registering for PoS transactions. The second returned value is the address of the PoS account.
Then paste the data field above to “Full node data”,and enter the votes you would like to lock (1000 CFX for 1 vote). Confirm in the portal.
Check Committee Status
About an hour later, check whether you are participating in PoS Mining successfully through PoS Dashboard: http://8.142.2.208/dashboard.html. You can also check the committee status through PoS Scan: https://posrc.confluxscan.net/pos
Dashboard Usage Tutorial:
View the current block height (the bottom number in the figure below is the height of the latest PoW chain and the top number is the height of PoS confirmation):
View the list of committees:
View Election History:
- Whether the node is started for the first time or restarted, it needs to wait for a startup time before it starts to work. The symbol of starting to work is the catch-up mode in the log changing from True to False, and the waiting time will last from ten to dozens of minutes.
- After starting to work, the nodes will be elected to the committee and have a chance to become members。
How to judge whether you have become a committee member?
- If your address is in the Current Committee, you are already a member. Members should vote for each PoS block, and the nodes will vote automatically
- If
 is displayed after it, the vote is normal. Keep the node running;
 - If
 follows, it indicates that the latest PoS block is not voted properly. Please wait for a few minutes to see whether the next few PoS blocks can vote normally (one PoS block per minute). If no, check whether the network is faulty or the node stops running. If the account is for 1 consecutive hour, the votes will be automatically unlocked, and you need to lock the votes again after the *** unlock waiting period ***。
- unlock waiting period: The PoS unlocking time is 7 days after the automatic unlock/manual unlocking command is issued. However, if the votes have not been locked for more than 7 days when the command is issued, the unlocking time will be delayed to 14 days. If you lock the votes in multiple batches, the unlocking time will be calculated separately.
- If
What if your address is not in the Current Committee?
- If your address is not in the Current Committee, check the Election History to see if you have the same time as anyone else
- If you are listed in election history, it indicates that you were in the committee
- If the time is the same as that of others, it indicates that your PoS node is running normally, and you can continue to wait. You can increase the locking votes to get more rewards.
- However, if the time is not the same as that of others, it indicates that you did not attend the latest committee election. Check your node and network status and wait for the next election (about once an hour).
- If you are not listed in election history, it indicates that you never attended the committee election.
- If you have just started/restarted for less than 2 hours, possibly there have been no committee elections since the node started to work.
- If you haven’t been there for quite a long time, check if you follow the tutorial steps.
- If you are listed in election history, it indicates that you were in the committee