Image by @Francov - Conflux Ambassador
Note: Support for Conflux eSpace in Unifra is for Mainnet only at this time. So, take this into account before trying Unifra’s infrastructure. As soon as there is support for Testnet we will update this and the other articles and/or tutorials.
About Unifra
Unifra is the open trusted infrastructure with which developers can quickly run nodes on various networks like Conflux eSpace, it also offers unique solutions for your dApps like notification for addresses, transactions and other innovative solutions.
Getting your App Keys
To start this tutorial, we will first need to create an Unifra account.
- Go to https://unifra.io/.
- Click on Login.
- You can login with a personal email, google, GitHub or with your crypto wallet.
Then you will need to generate a new application and obtain the corresponding keys.
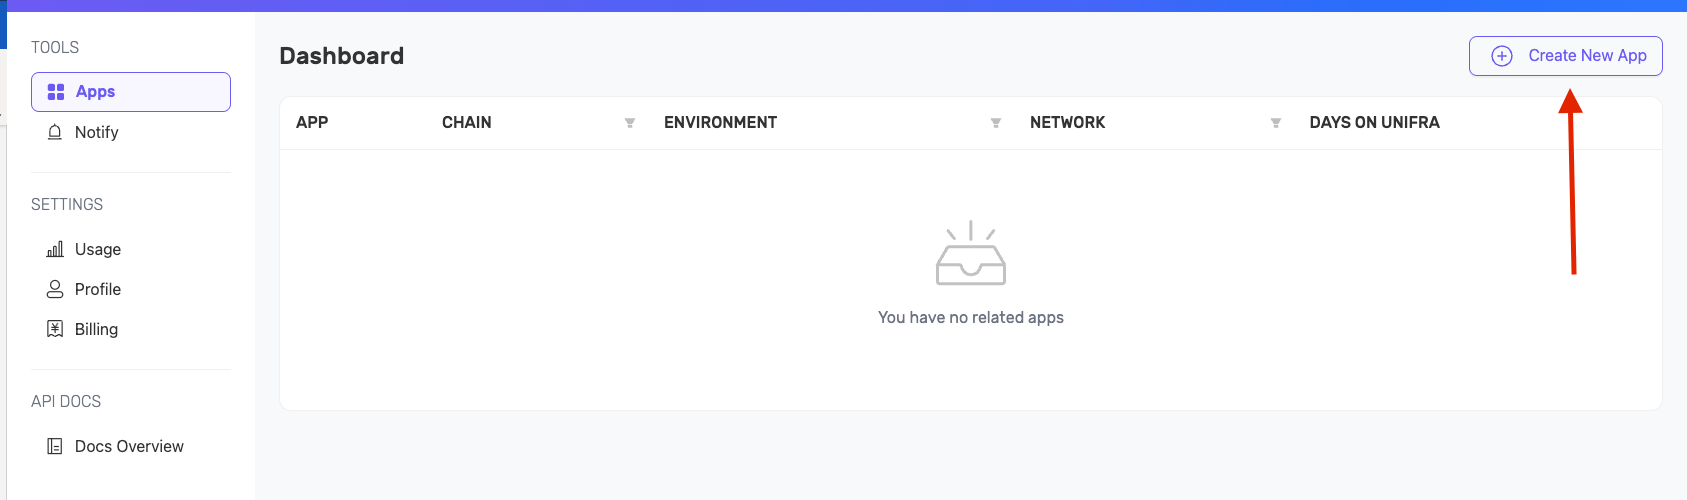
- Go to the Apps panel within Tools.
- Click on Create New App.
-
Fill in the data such as name, description, development environment, chain and network. In our case it will be (AppDemo, AppDemo, Development, Conflux, eSpace) and click on Create App.
-
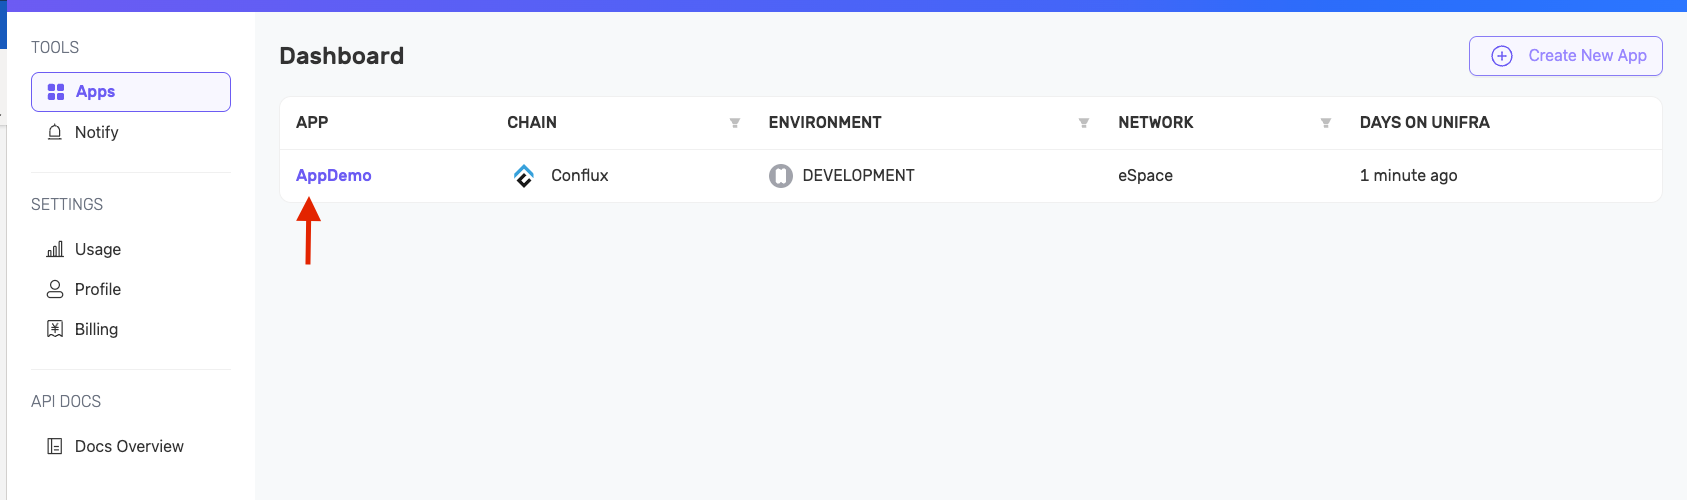
You will see the name of your App inside your Dashboard. Click on the name of your App.
- Inside your app panel, click on View Key in the upper right corner. Your API KEY, HTTP, and WEBSOCKETS will be displayed. According to the need and architecture of your application, you must take the one you need, in our case with HTTP it is more than enough to communicate with our app in Unifra.
NOTE: Do not share your App Key with anyone, as your application would be at risk of intruders.
Unifra with NodeJS
For this first example of how to connect your app with Unifra, we will use a basic NodeJS backend and make a 1 CFX transaction from a sender account to another account displaying the transaction hash to verify in the block explorer and The Unifra App Dashboard.
Check the final code on GitHub:
Environment Variables
- First create a folder to hold our entire project and move it into that directory.
$ mkdir basic_unifra && cd basic_unifra
- Initialize your NodeJS project with the command:
$ npm init -y
- Create your src directory with its respective index.js and an .env file for variables outside the src directory
$ mkdir src && touch .env && cd src && touch index.js && cd ..
- Open the directory with your favorite code editor
$ code .
- Install the necessary dependencies
We will use dotenv to read the environment variables and web3 to connect to the Unifra node.
$ npm install web3 dotenv
- In the .env file, place as a variable your HTTP KEY of your app in Unifra, your private key where you will send the test CFX eSpace and your recipient address (eSpace address)
// .env

HTTP_UNIFRA_KEY = “https://cfx-espace.unifra.io/v1/{api-key}”

SENDER_PRIVATE_KEY = “private_key”

RECEIVER_ESPACE_ADDRESS = “address_to_receive_funds_on_eSpace”
Note: Do not expose your private key, whoever has access to the private key of your account, has access to your funds.
- In the index.js file inside the src directory paste the following code:
const Unifra = require("./Unifra");

(async function main() {
    const {
        getBalance,
        getGasPrice,
        getNextNonce,
        generateAccountFromPK,
        signTransaction,
        sendTransaction,
        ESPACE_PRIVATE_KEY,
        ESPACE_RECEIVER,
    } = Unifra;

    // get prev balance of CFX
    const prevBalance = await getBalance(ESPACE_RECEIVER);
    console.log(`Prev balance: ${(Number(prevBalance) / 10**18)} CFX`);

    // generate the account from our private_key to get the nonce and address related to it
    const account = await generateAccountFromPK(ESPACE_PRIVATE_KEY);
    const nonce = await getNextNonce(account.address);
    const senderBalance = await getBalance(account.address);

    /**
     * Check if sender address has enough balance to send 1 CFX
     * Note: 1 CFX = 10^18 Drip
     *       and 1.1 CFX = 1100000000000000000 Drip
     */
    if (senderBalance >= 1100000000000000000) {
        /**
         * This is the basic structure for seding a transaction
         *
         * from: string,
         * to: string,
         * value: number in Drip units
         * gas: number,
         * nonce: number,
         * gasPrice: number,
         * data: string  | as we aren't calling a smart contract function or creating a new one we don't need to add data field
         */
        const tx = {
            from: account.address,         // sender address (optional)
            to: ESPACE_RECEIVER,           // receiver address
            value: 10**18,                // units in Drip
            gas: 21000,                    // minimum used for this type of transaction (we are not calling a smart contract function for example)
            nonce,                         // transaction identifier for the sender address, this is unique and progressive; 1,2,3,4...
            gasPrice: await getGasPrice(), // get the most recent price of gas
        }

        // once we have our tx we need to sign our intention to send before with the private key of the sender.
        console.log("Signing Transaction...")
        const txSigned = await signTransaction(tx, ESPACE_PRIVATE_KEY);

        // once signed just send it
        console.log("Sending Transaction...");
        const sendTx = await sendTransaction(txSigned.rawTransaction)

        // wait 10 seconds and display the transaction hash and new receiver balance
        // in order to confirm that the transaction has been success.
        console.log("Confirming Transaction...")
        setTimeout(async () => {
            console.log("Hash:", sendTx)

            const newReceiverBalance = await getBalance(ESPACE_RECEIVER)
            console.log(`New balance: ${(Number(newReceiverBalance) / 10**18)} CFX`)
        }, 10000)
    }
    else return console.log({ success: false, message: "Sender does not have enough balance"});

})();
- You may have noticed that the index file imports a class from a file called Unifra.js, so create the Unifra.js file at the same level as your index.js and paste the following code:
const Web3 = require("web3")
require('dotenv').config();

class Unifra {
    // read HTTP APP UNIFRA KEY from the '.env' file
    static HTTP_UNIFRA_KEY  = process.env.HTTP_UNIFRA_KEY;
    // Read private key from the '.env' file
    static ESPACE_PRIVATE_KEY = process.env.SENDER_PRIVATE_KEY;
    // read Receiver Address from the '.env' file
    static ESPACE_RECEIVER = process.env.RECEIVER_ESPACE_ADDRESS;

    static async getBalance(address) {
        const web3 = new Web3(Unifra.HTTP_UNIFRA_KEY);
        const balance = await web3.eth.getBalance(address);

        return balance;
    }

    static async getNextNonce(address) {
        const web3 = new Web3(Unifra.HTTP_UNIFRA_KEY);
        const nonce = await web3.eth.getTransactionCount(address, "pending");

        return nonce;
    }

    static async generateAccountFromPK(pk) {
        const web3 = new Web3(Unifra.HTTP_UNIFRA_KEY);
        const account = await web3.eth.accounts.privateKeyToAccount(pk);

        return account;
    }

    static async getGasPrice() {
        const web3 = new Web3(Unifra.HTTP_UNIFRA_KEY);
        const gasPrice = await web3.eth.getGasPrice();
        return gasPrice;
    }

    static async signTransaction(tx, pk) {
        const web3 = new Web3(Unifra.HTTP_UNIFRA_KEY);
        const signed = web3.eth.accounts.signTransaction(tx, pk);
        return signed;
    }

    static async sendTransaction(raw) {
        try {
            const web3 = new Web3(Unifra.HTTP_UNIFRA_KEY);
            const { transactionHash } = await web3.eth.sendSignedTransaction(raw);
            return transactionHash;
        } catch(e) {
            console.error(e);
        }
    }
}

module.exports = Unifra;
Calling The Main Function
Once you have everything ready, all you have to do is see the magic!
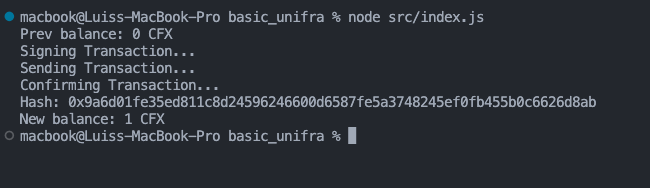
Run the index.js with the following command:
$ node src/index.js
And this should appear on your console:
Verifying The Transaction
Enter the Block Explorer and paste the hash. You will now be able to see more information about your transaction.

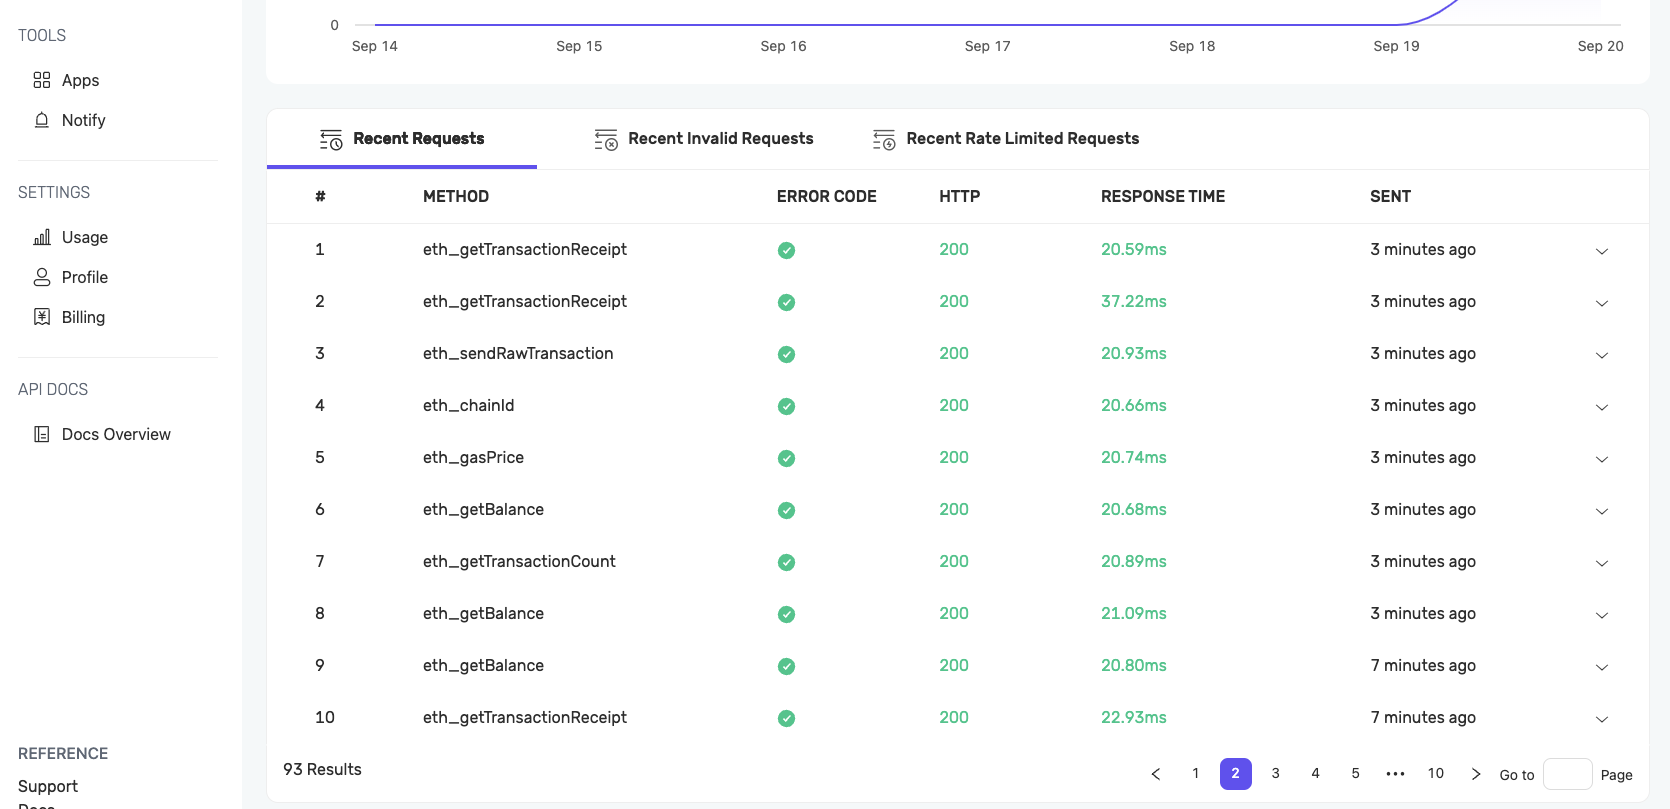
And if we see the panel of our App in Unifra, we will see the activity of the calls as well.